

Registering For Classes (Example 2)

Registration Welcome Message
Donec ullamcorper nulla non metus auctor fringilla. Maecenas sed diam eget risus varius blandit sit amet non magna. Cras mattis consectetur purus sit amet fermentum. Cras justo odio, dapibus ac facilisis in, egestas eget quam. Donec id elit non mi porta gravida at eget metus.
Etiam porta sem malesuada magna mollis euismod. Cras justo odio, dapibus ac facilisis in, egestas eget quam. Fusce dapibus, tellus ac cursus commodo, tortor mauris condimentum nibh, ut fermentum massa justo sit amet risus. Maecenas sed diam eget risus varius blandit sit amet non magna. Nullam quis risus eget urna mollis ornare vel eu leo. Etiam porta sem malesuada magna mollis euismod.
Benefit 1

Fusce dapibus, tellus ac cursus commodo, tortor mauris condimentum nibh, ut fermentum massa justo sit amet risus. Lorem ipsum dolor sit amet, consectetur adipiscing elit. Cras mattis consectetur purus sit amet fermentum.
Benefit 2
Nulla vitae elit libero, a pharetra augue. Nullam quis risus eget urna mollis ornare vel eu leo. Sed posuere consectetur est at lobortis.
Benefit 3
Integer posuere erat a ante venenatis dapibus posuere velit aliquet. Cum sociis natoque penatibus et magnis dis parturient montes, nascetur ridiculus mus. Curabitur blandit tempus porttitor.
How To Register for Courses
Step 2 – Navigate to our Training page
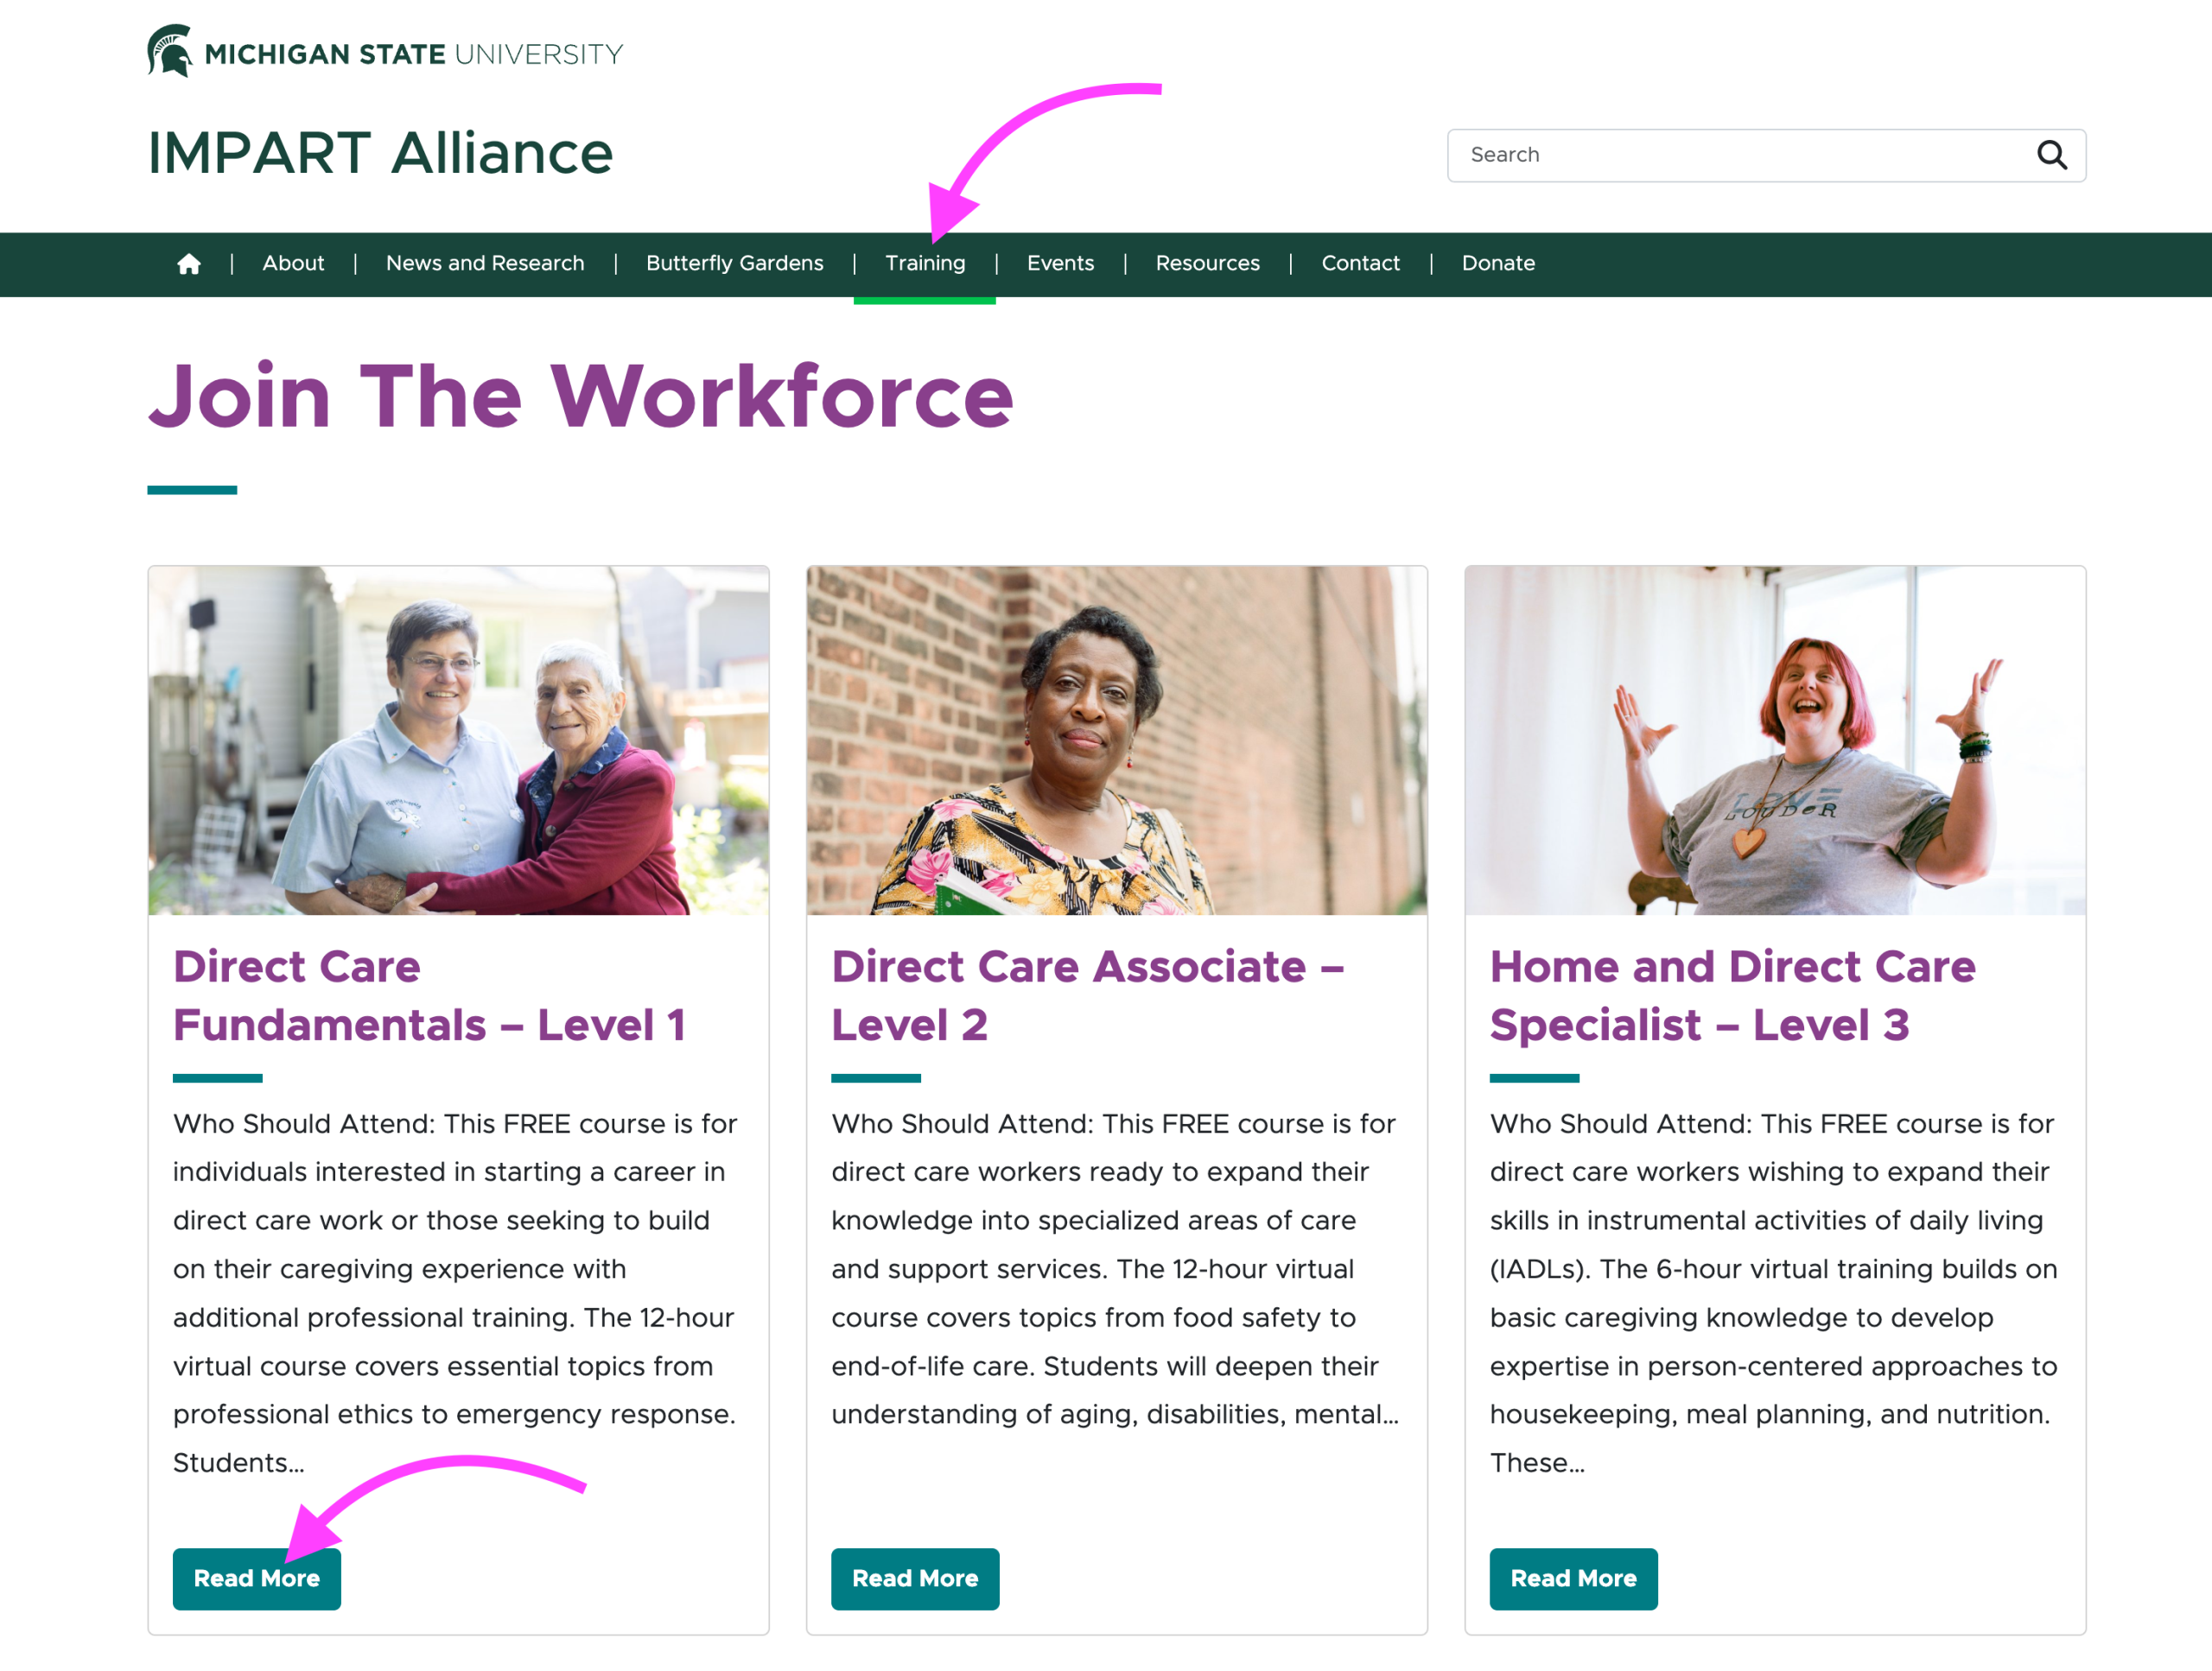
In the top navigation, click on the “Training” link. This will bring you to the page title “Join The Workforce”. From here, scroll down to view the available courses. When you find one of interest, click the “Read More” button for more information.
Step 3 – Begin Registration
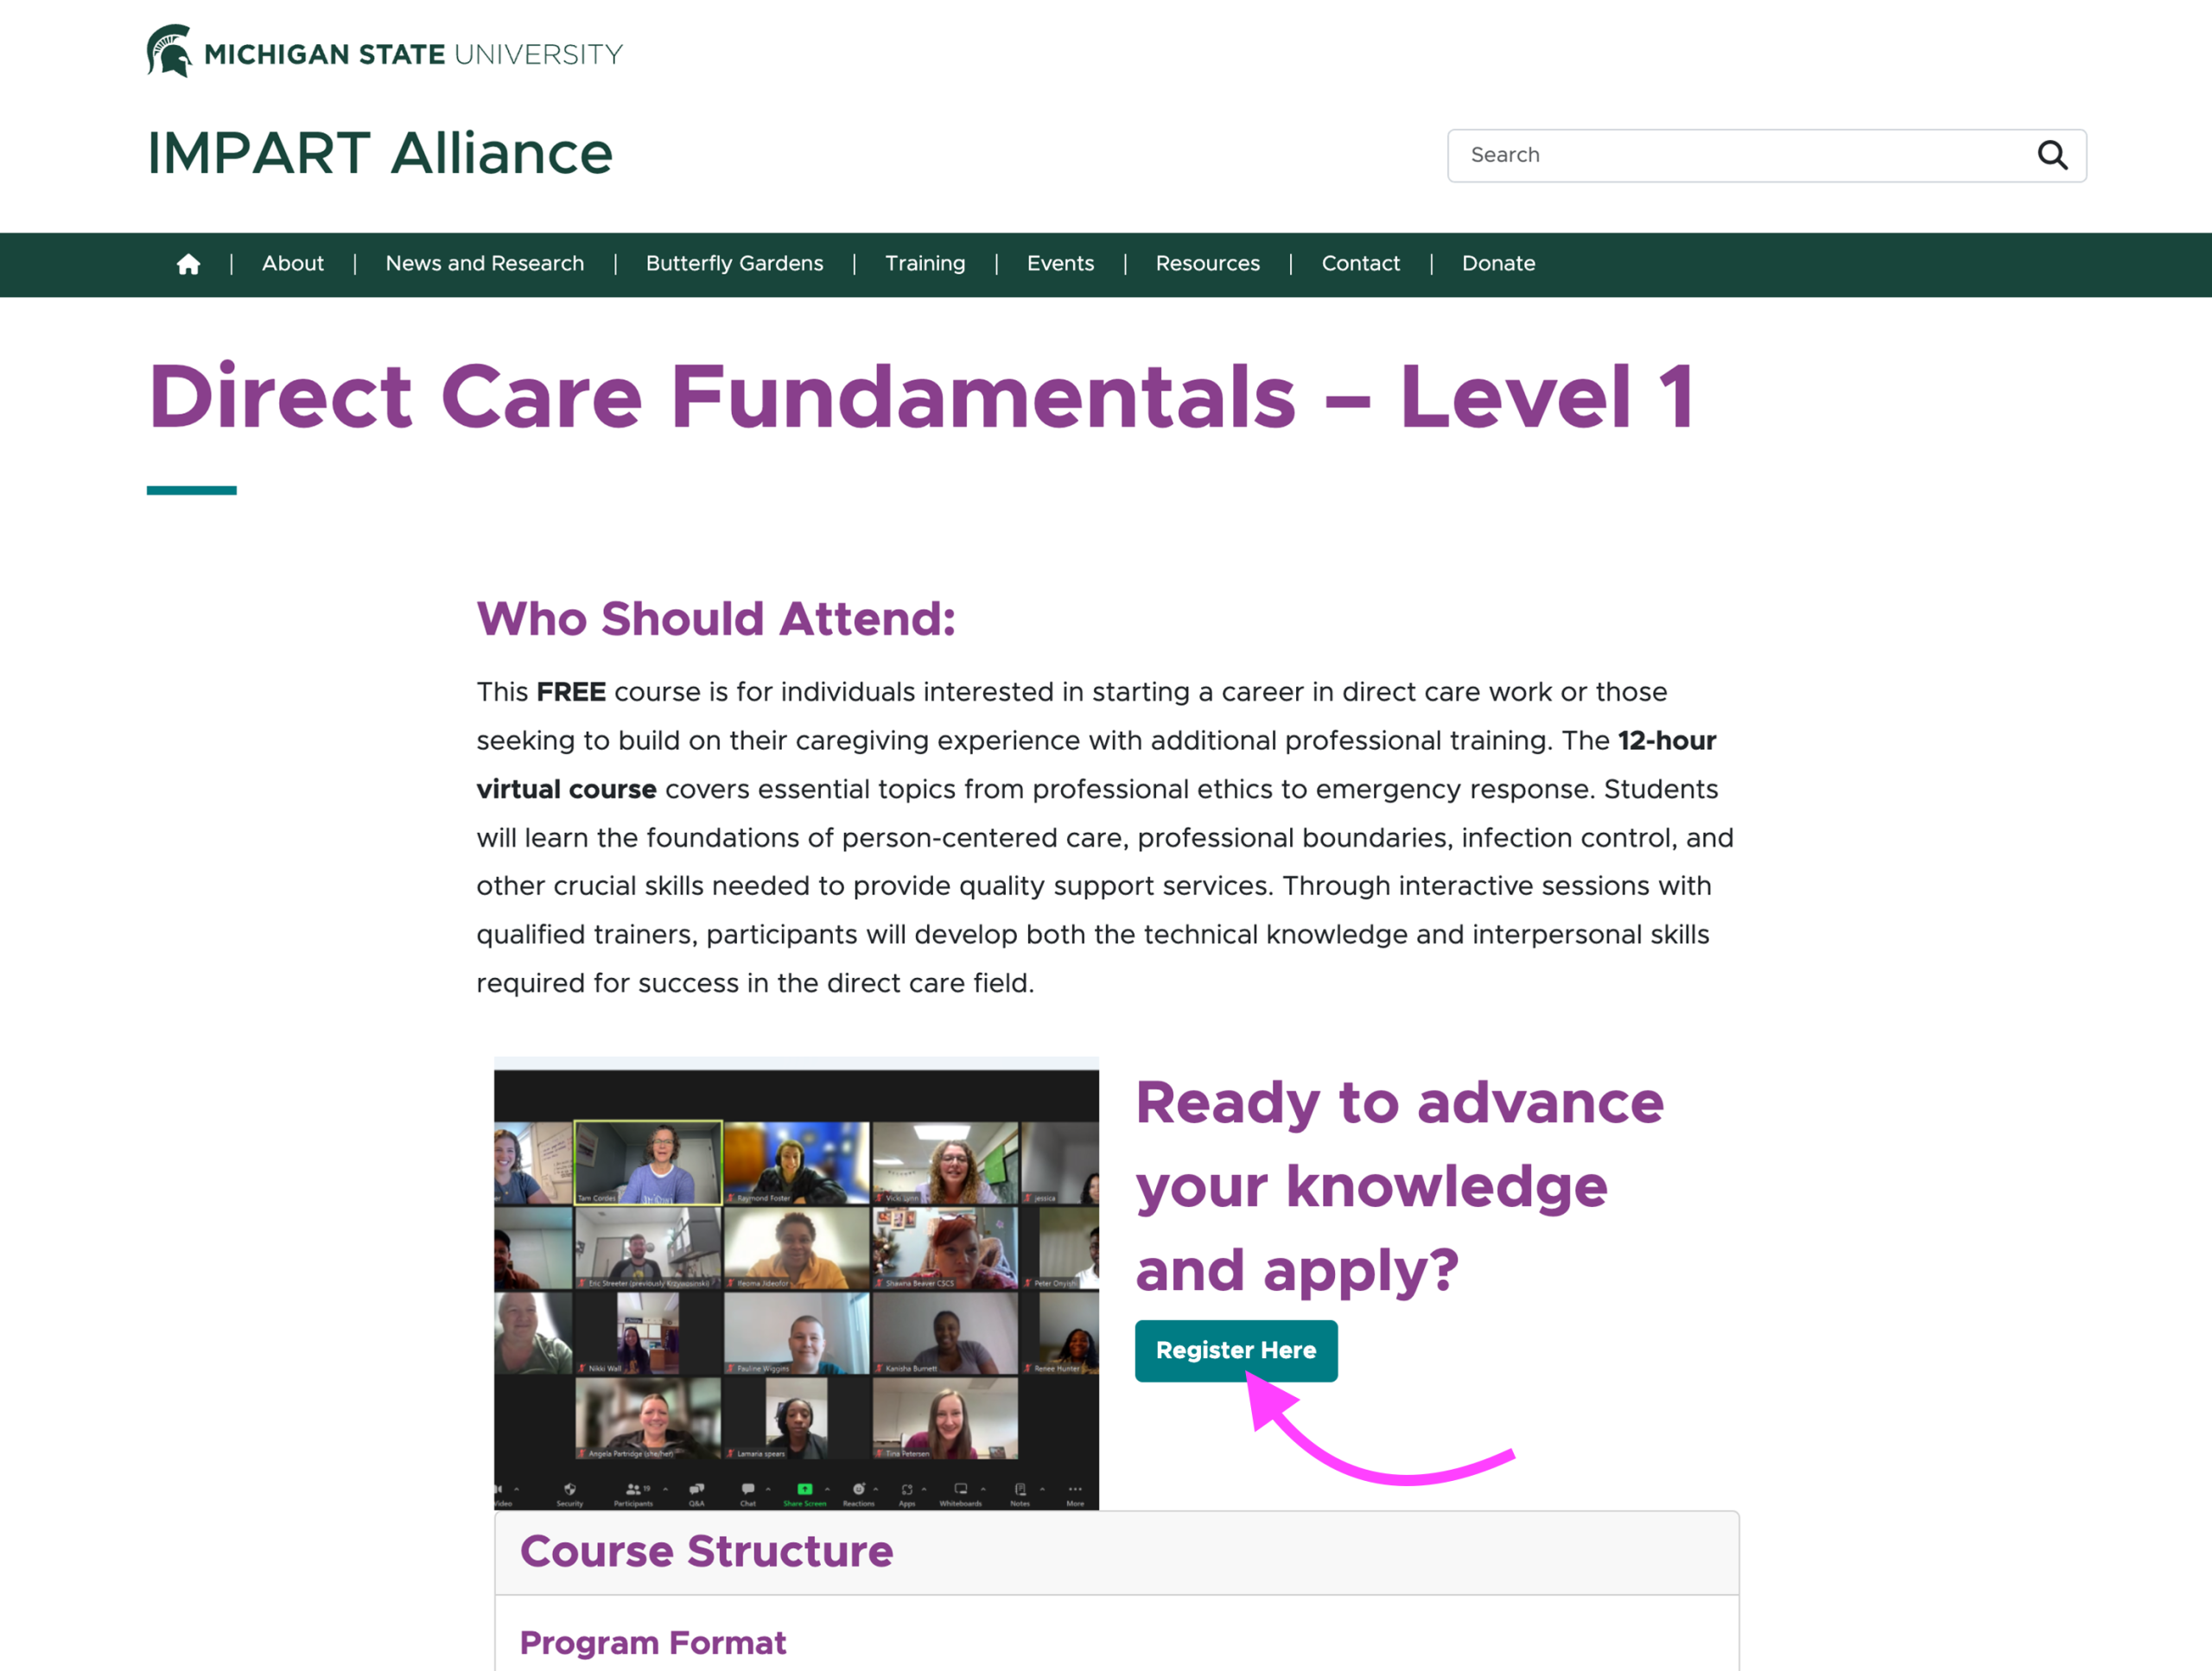
After selecting a course and reviewing the course details, find the “Register Here” button to begin the registration process. This will take you to our course registration storefront. Don’t worry! All of the available courses through IMPART Alliance are free.
Step 4 – View Available Course Levels
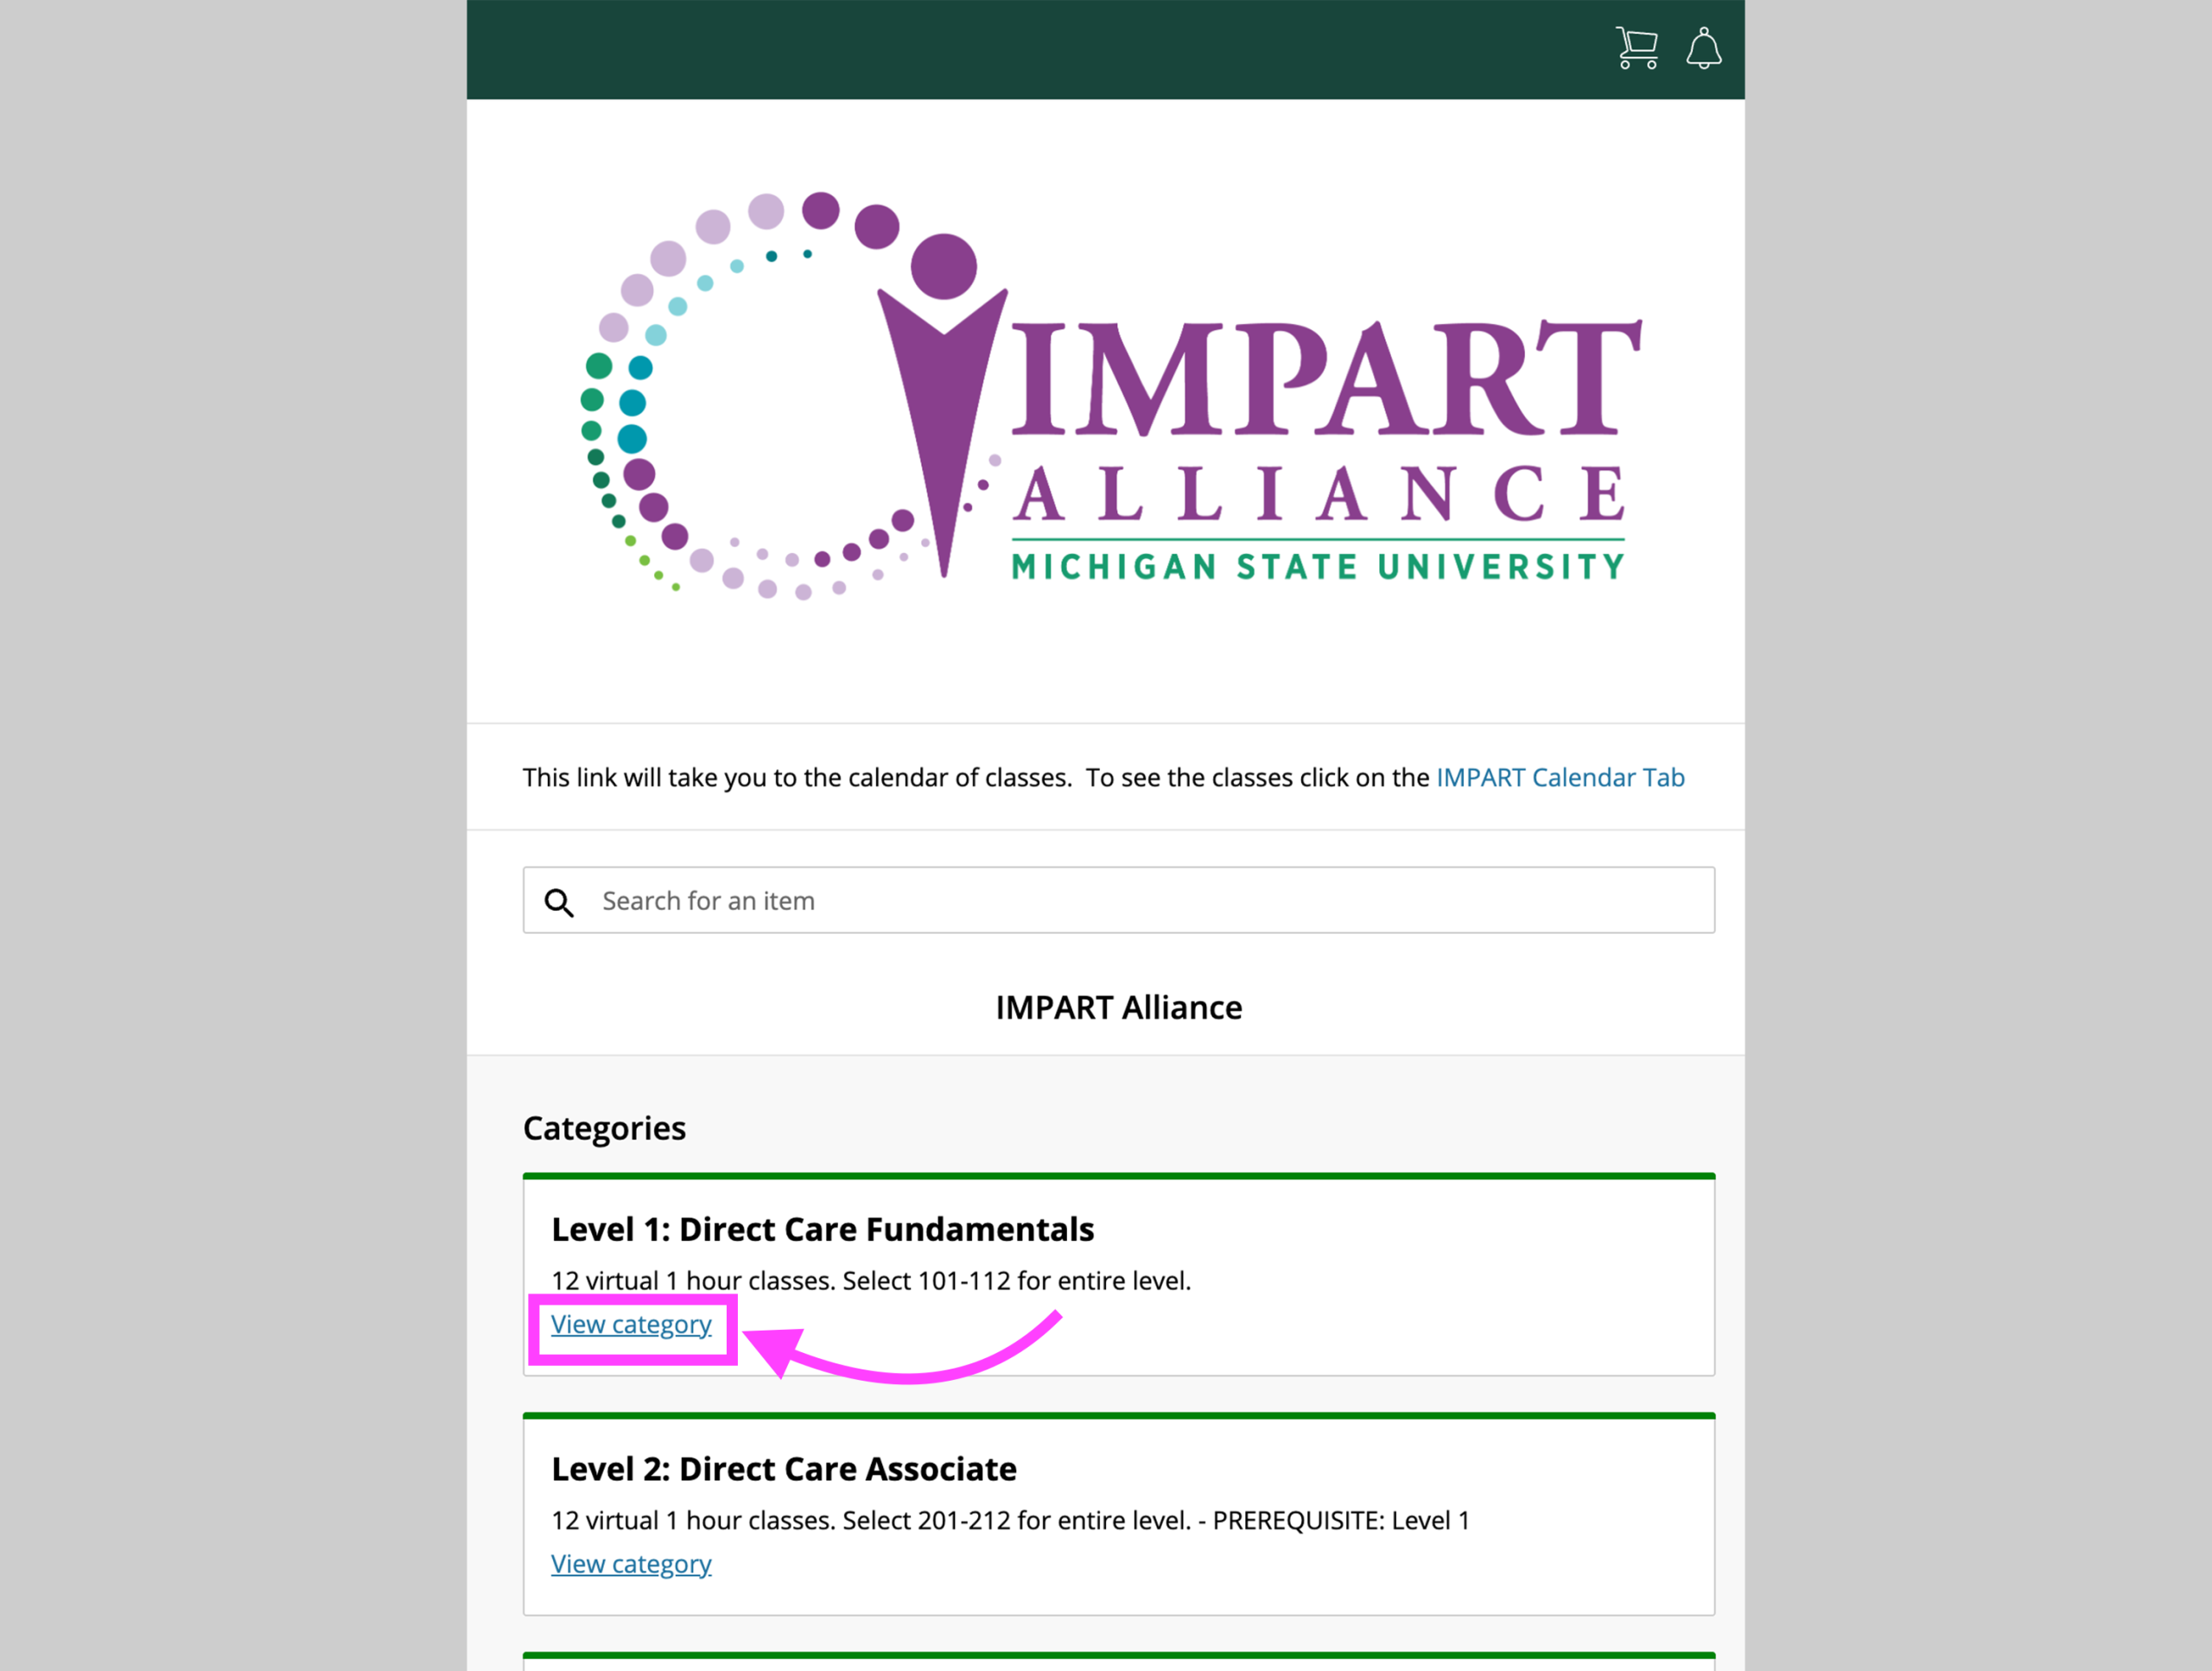
From the storefront, click “View category” to see all available course levels.
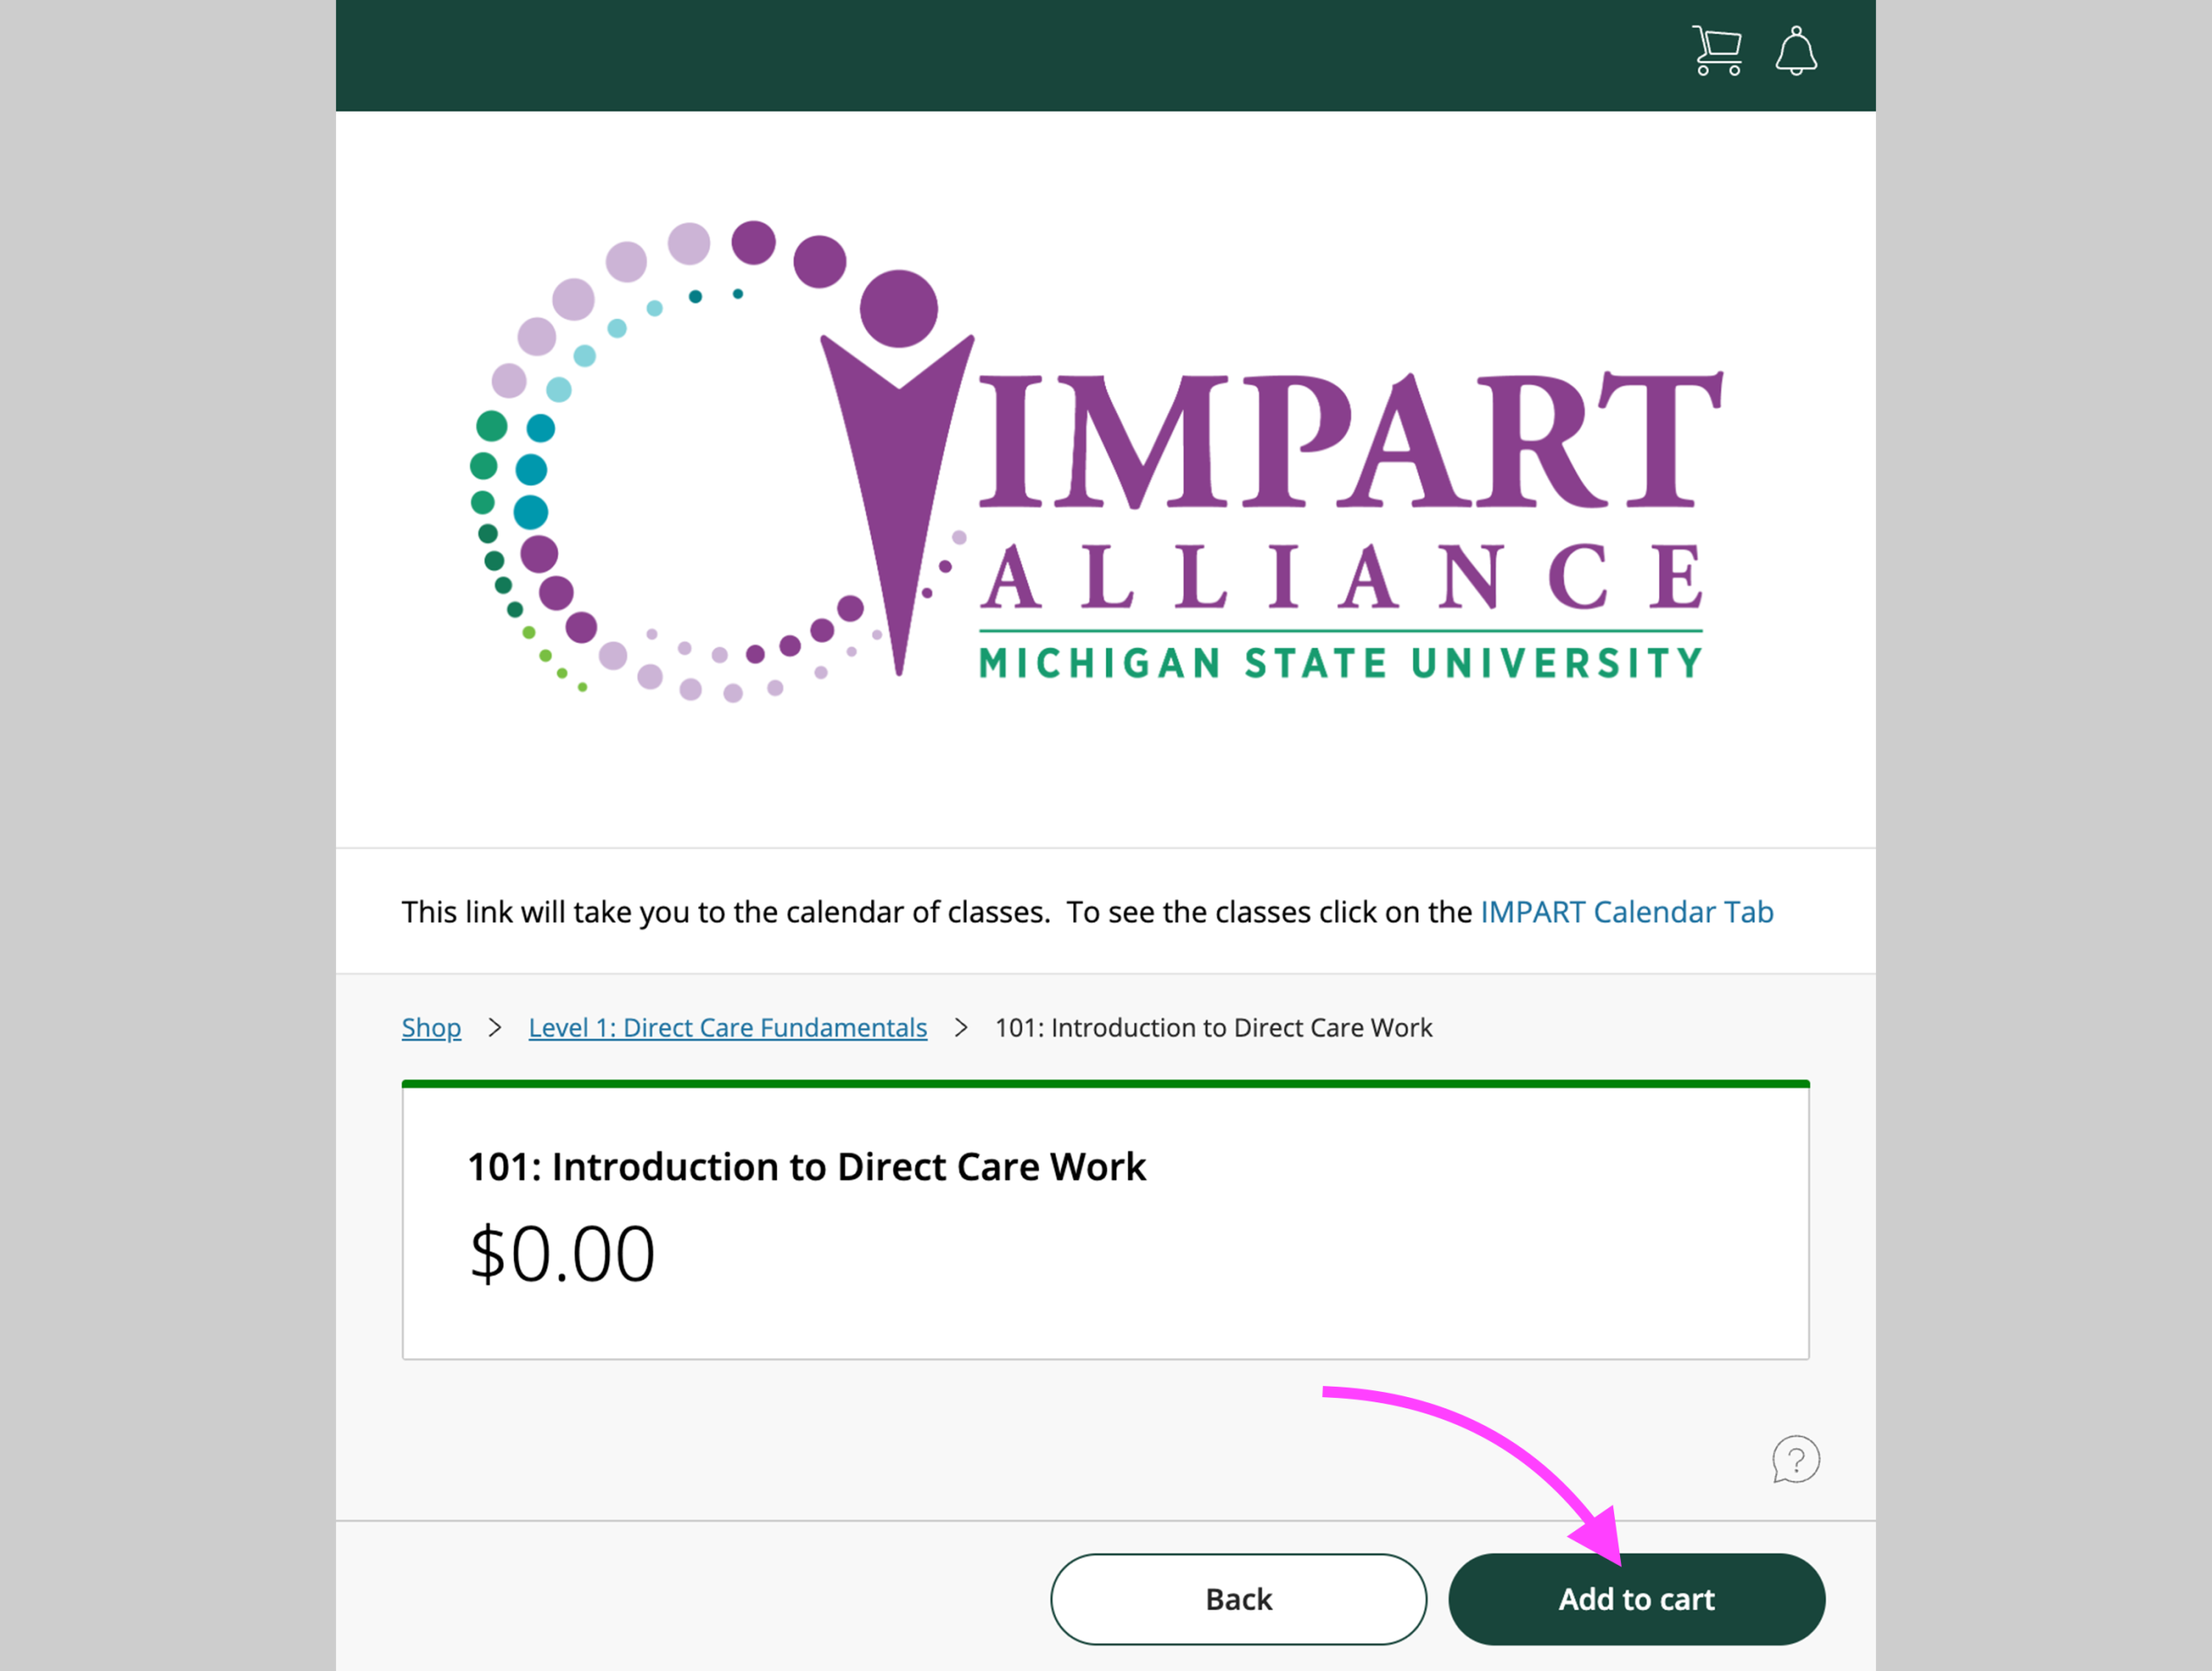
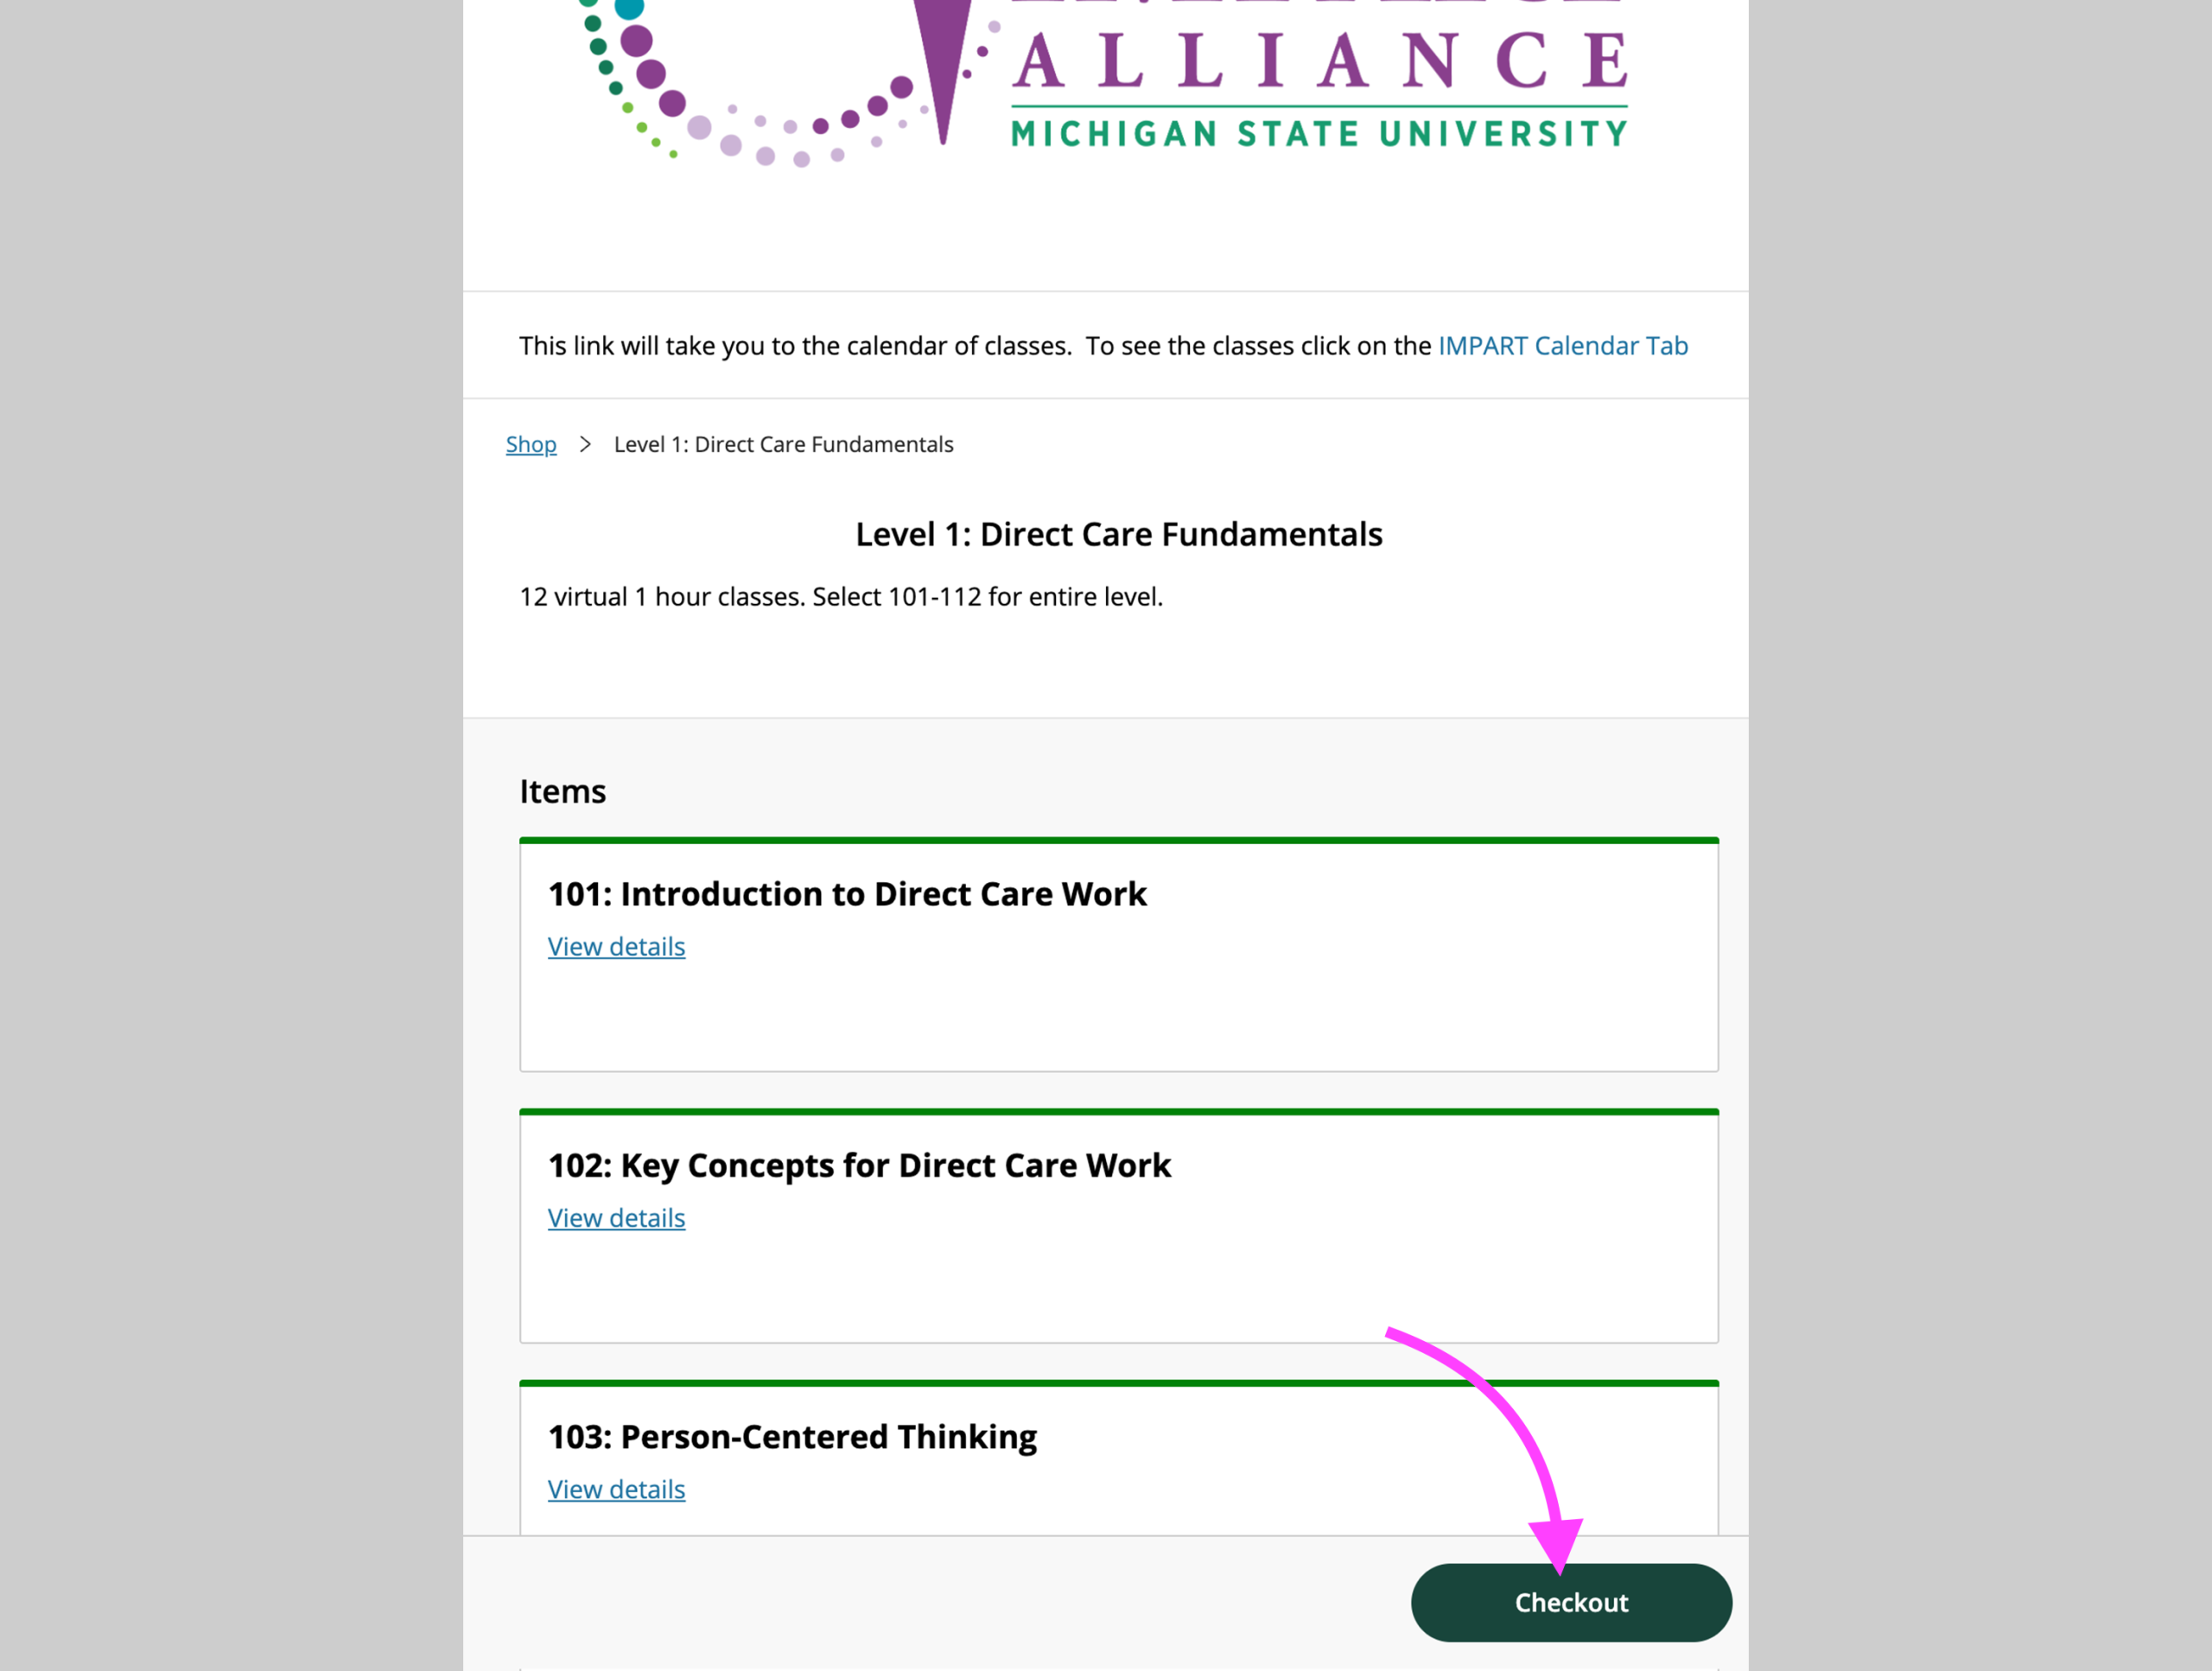
Step 5 – View Course Details
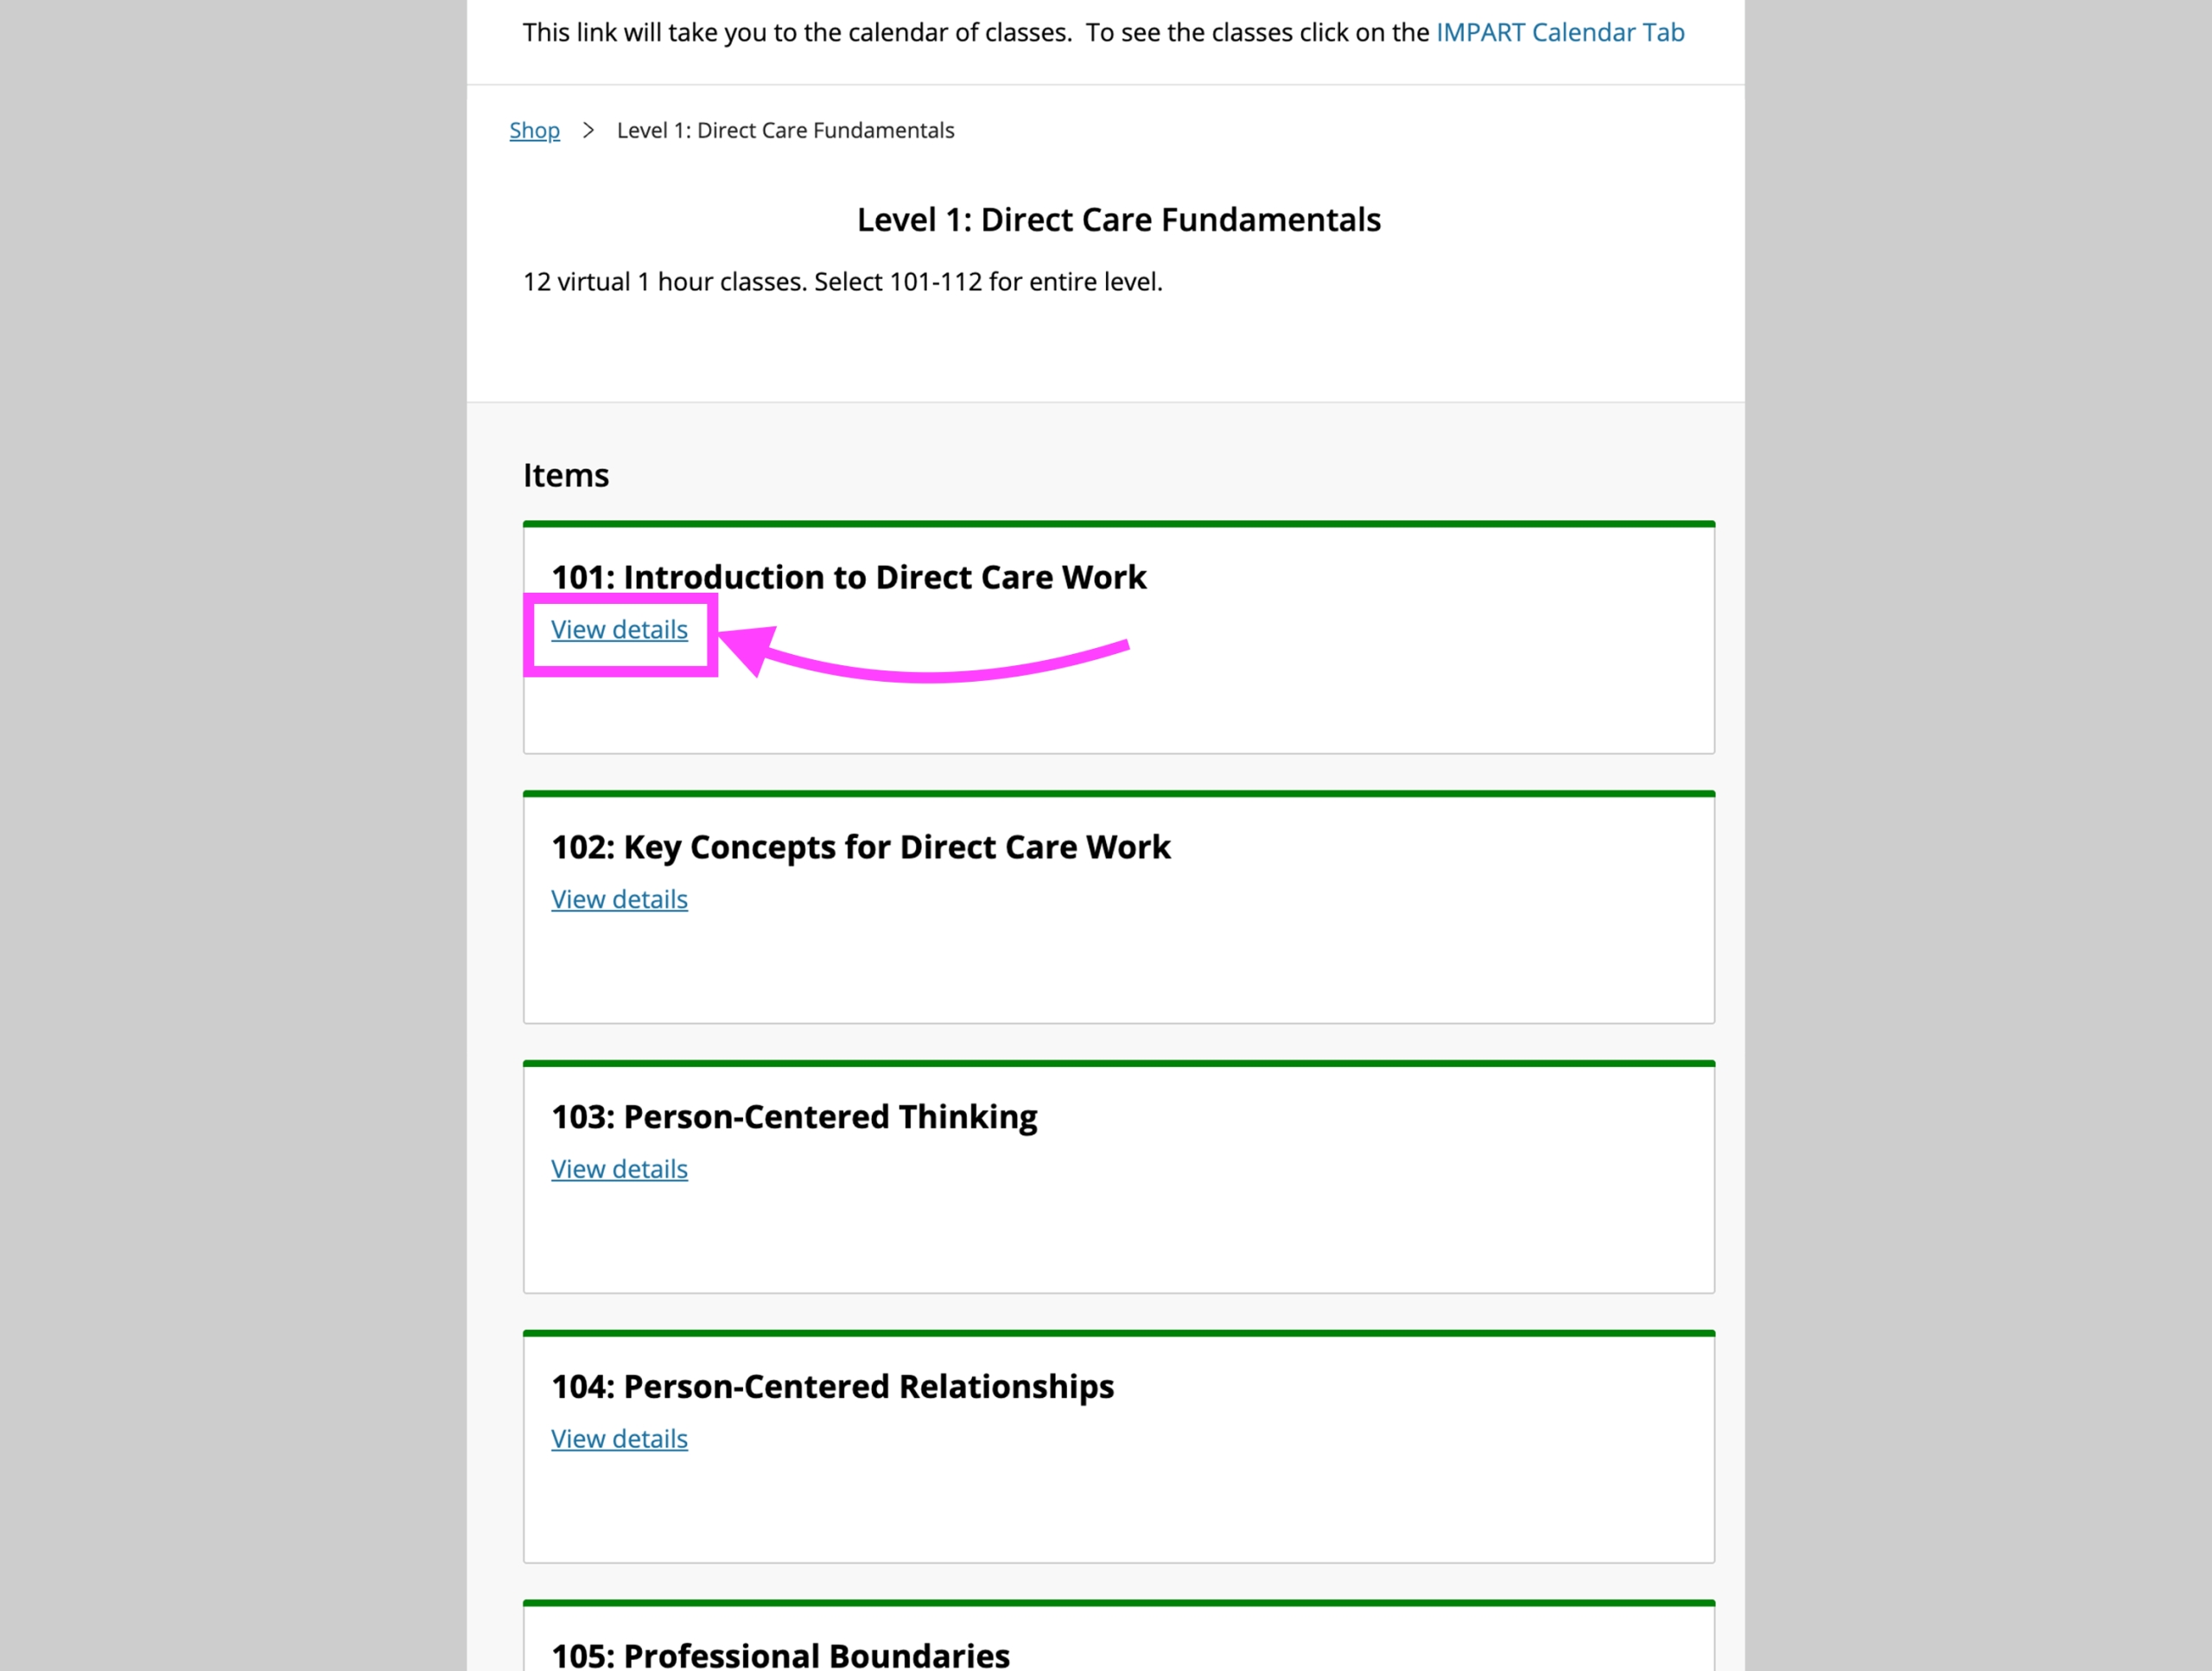
Within each course level, you have the option to view each course’s details and add individual courses to your cart. Click “View details” and then click the “Add to Cart” button to add the course to your cart. Once you have added a course to the cart, you will be returned to the same course level category page, where you may view and add additional courses. Please note: You will need to add all available courses to the cart to complete an entire level. Once the courses you wish to enroll in are in the cart, you may either click the shopping cart icon at the top right, or the “Checkout” button in the bottom right.
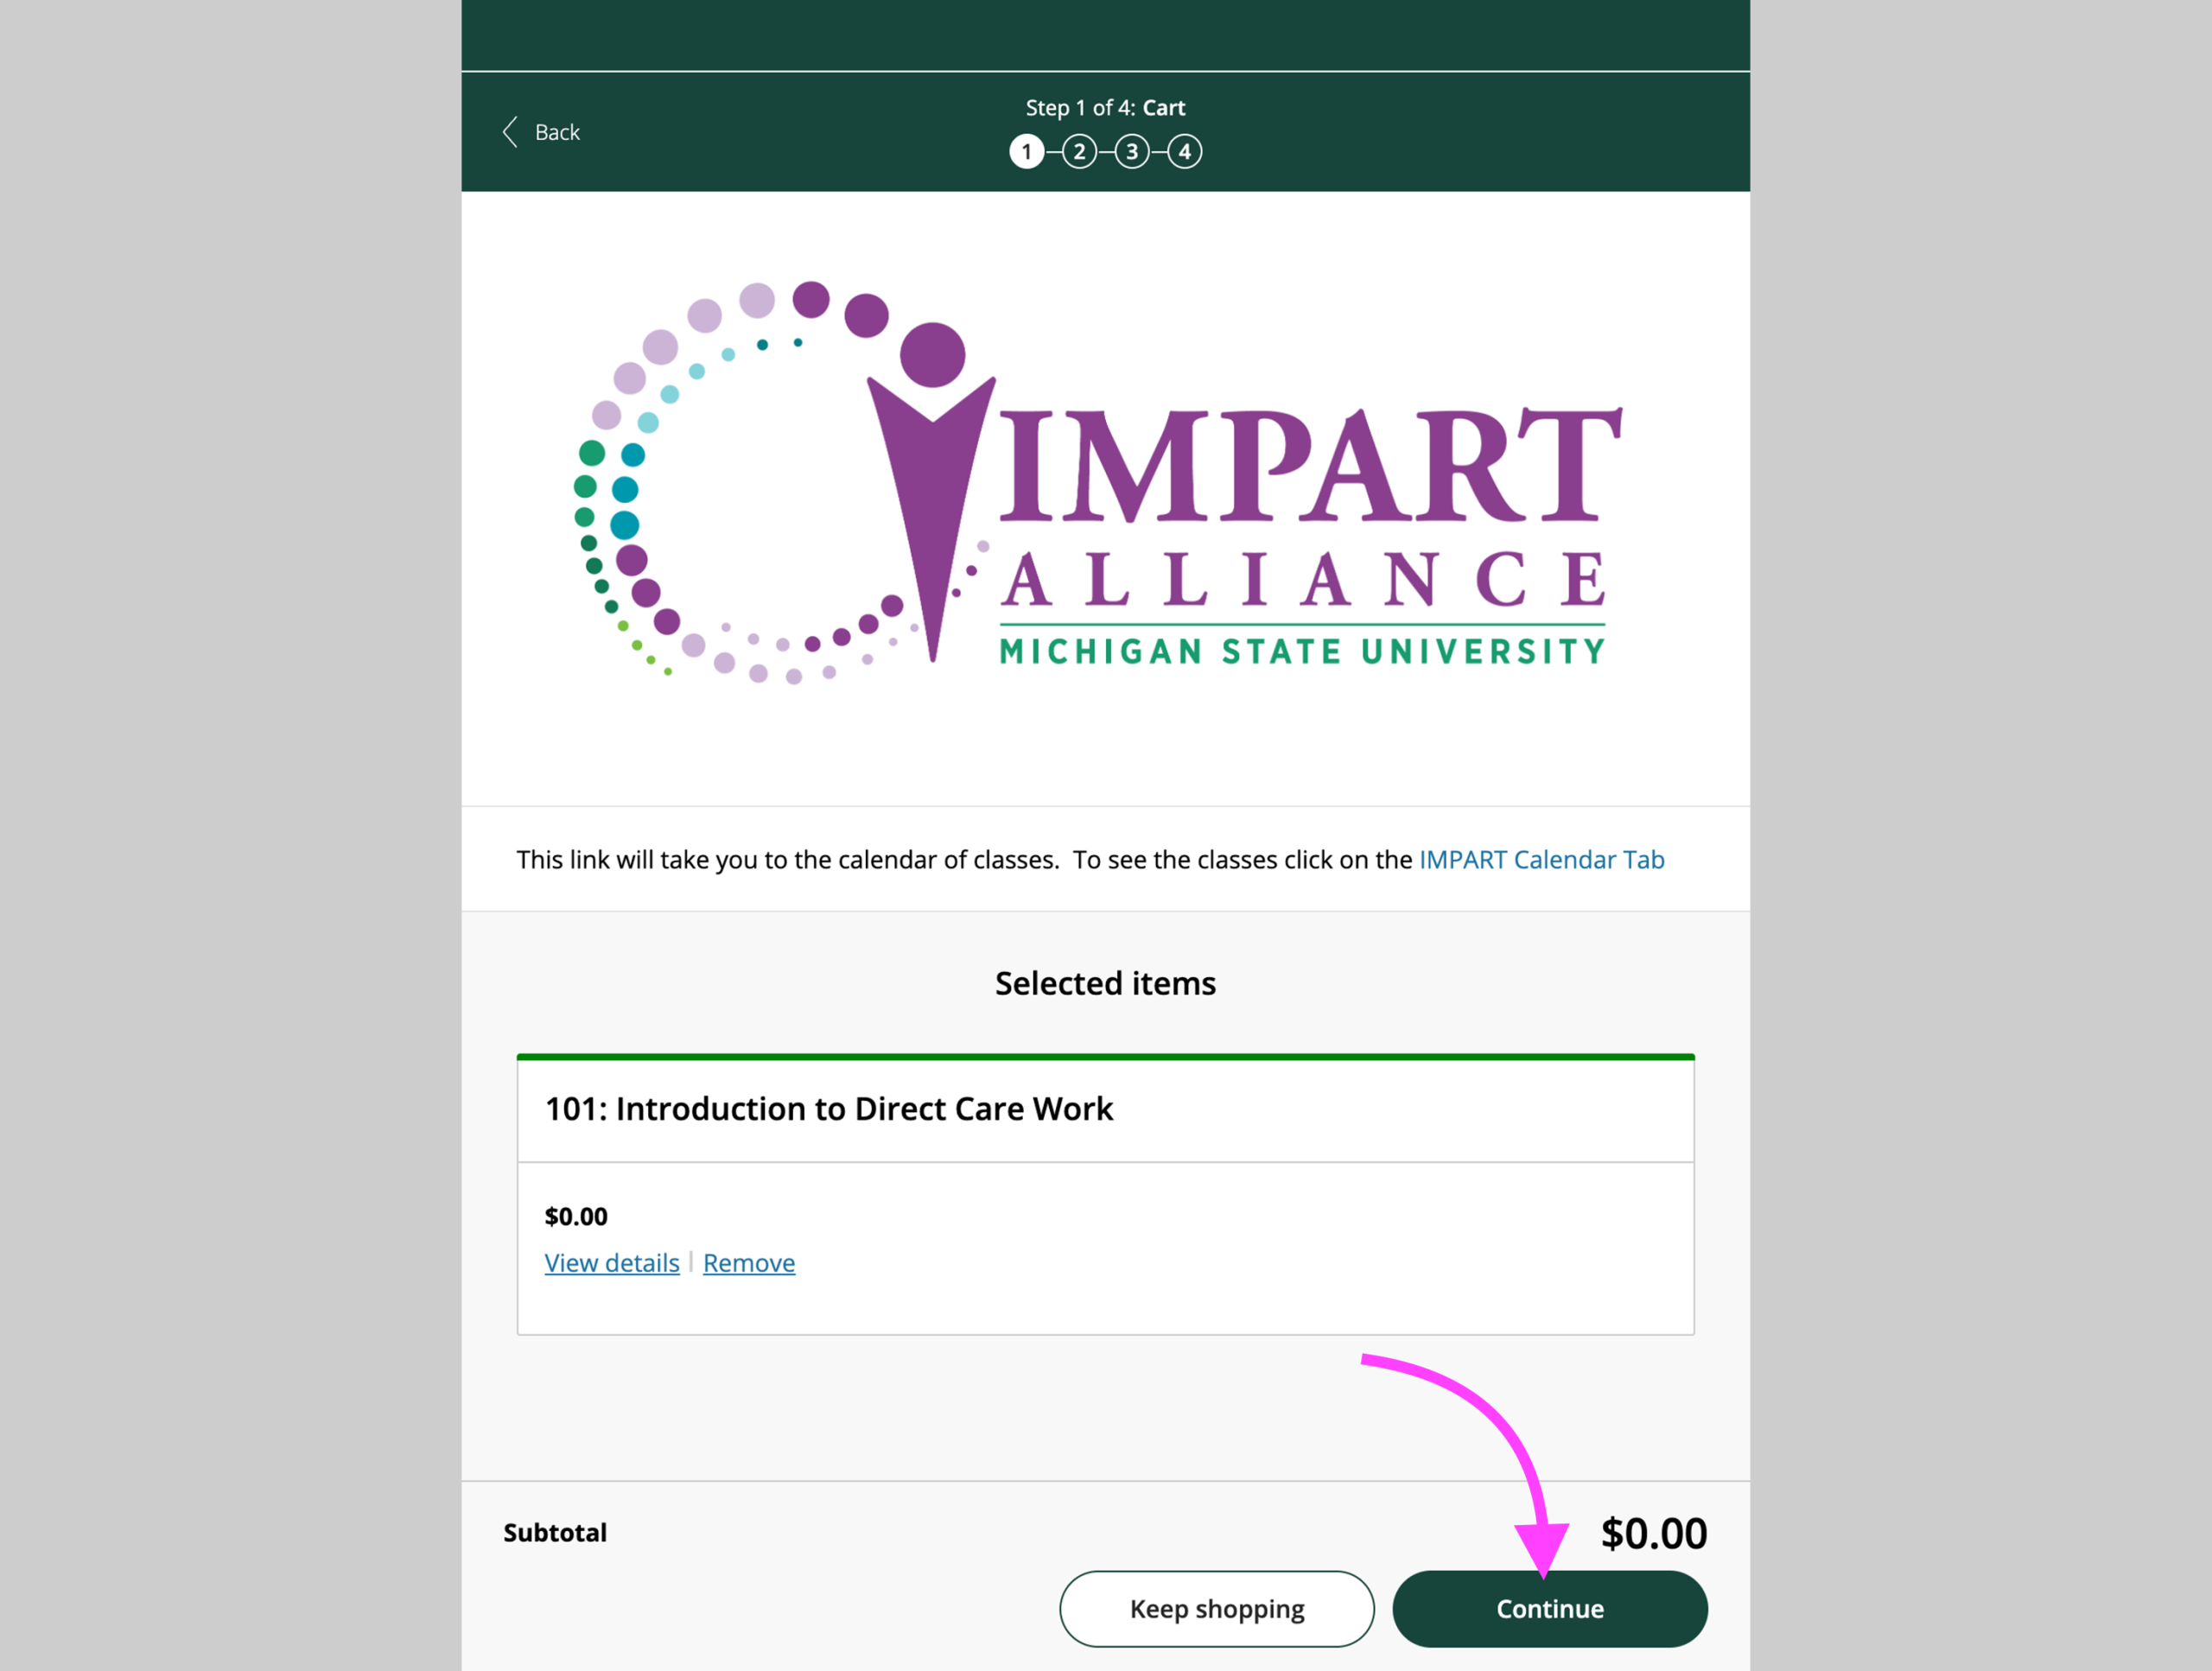
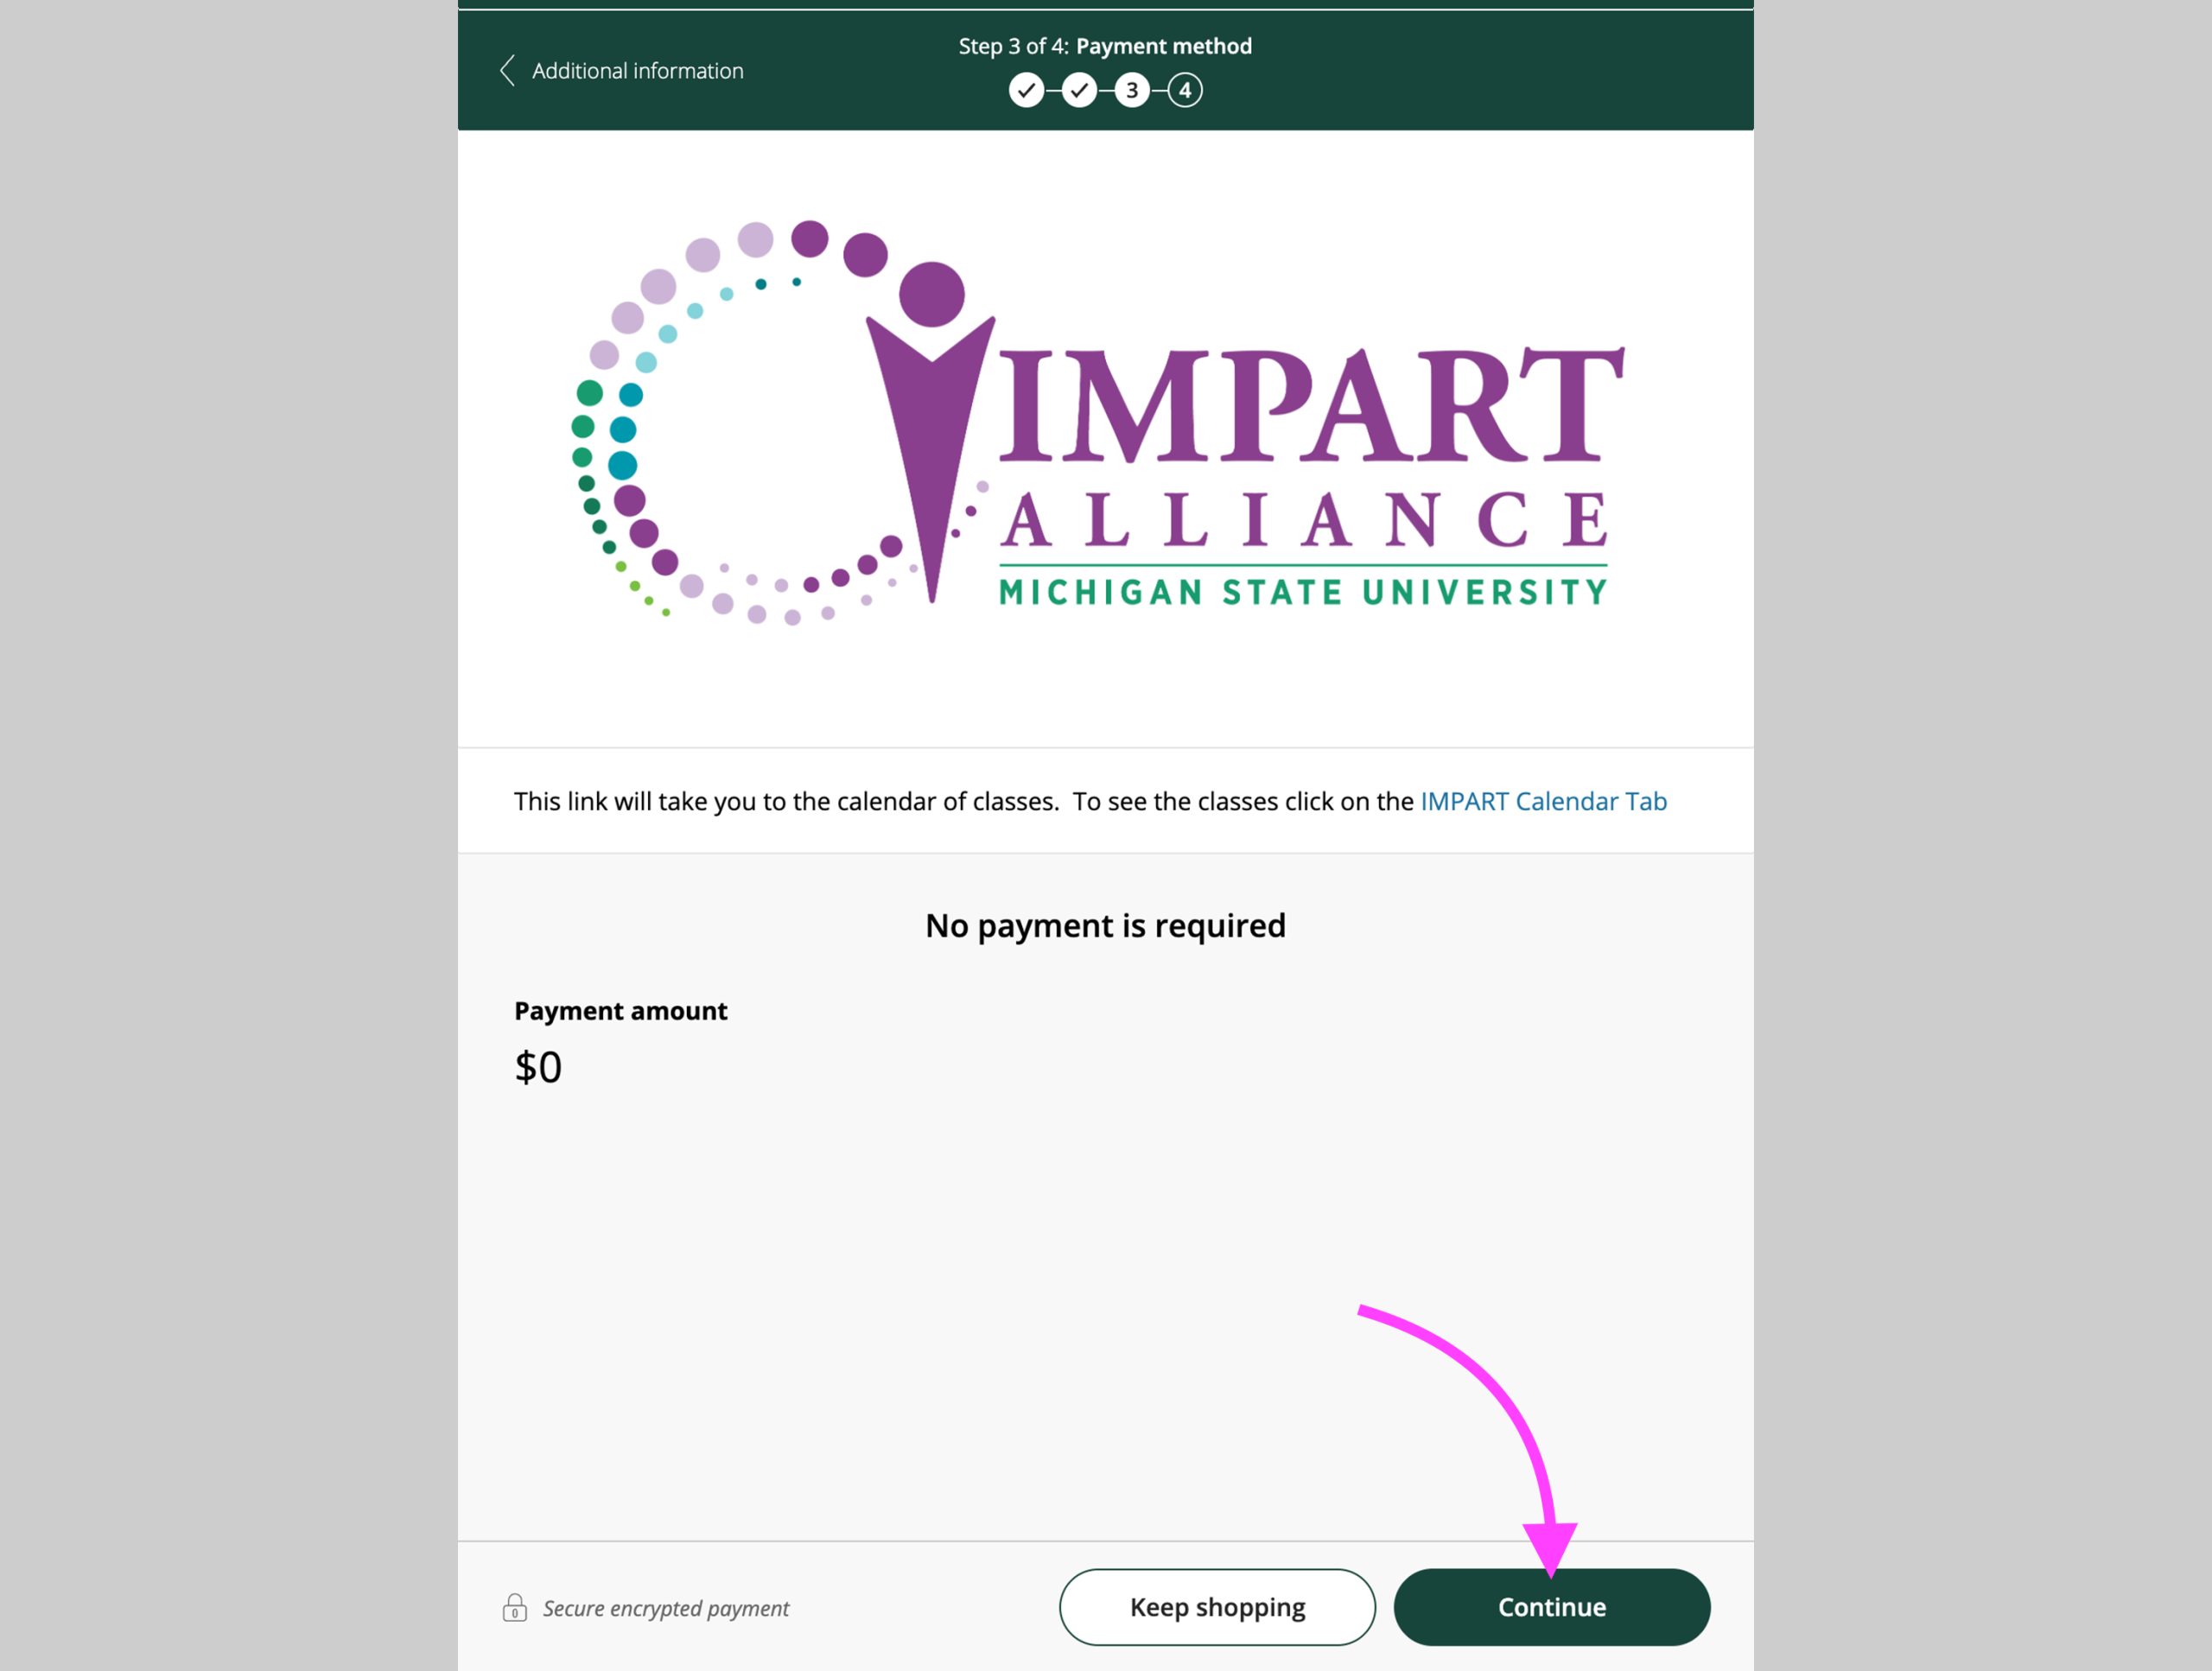
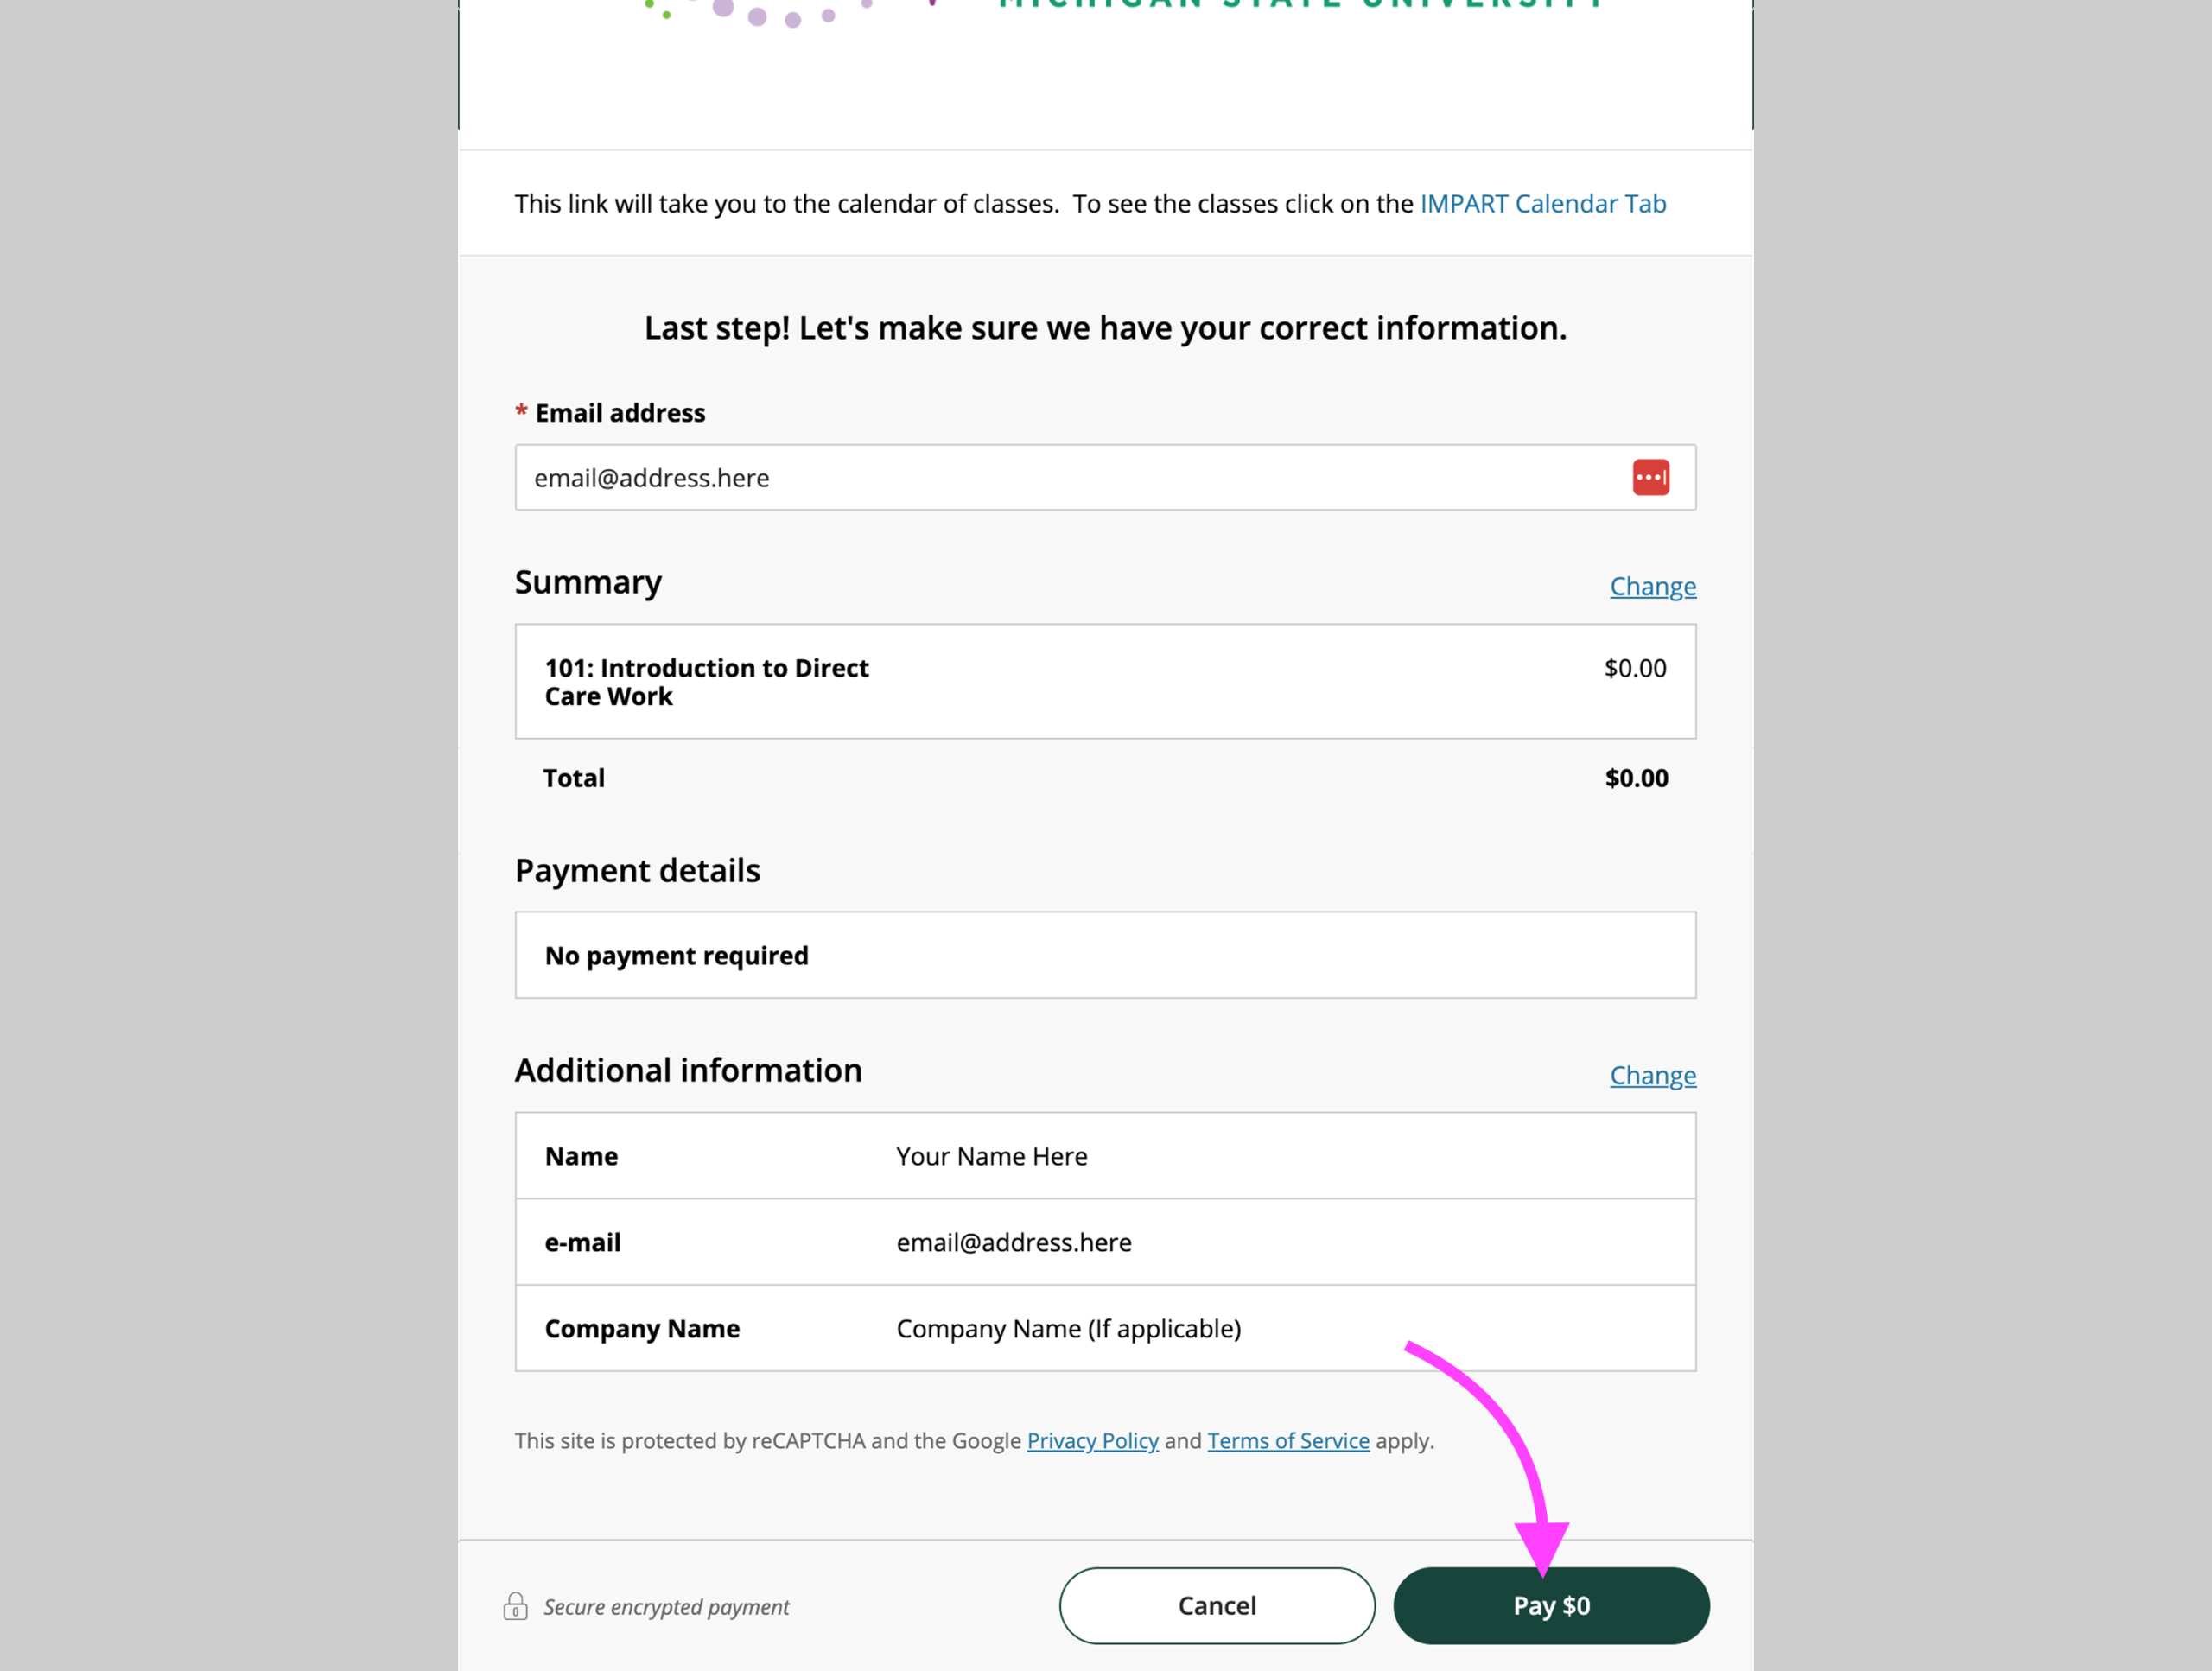
Step 6 – Complete Your registration
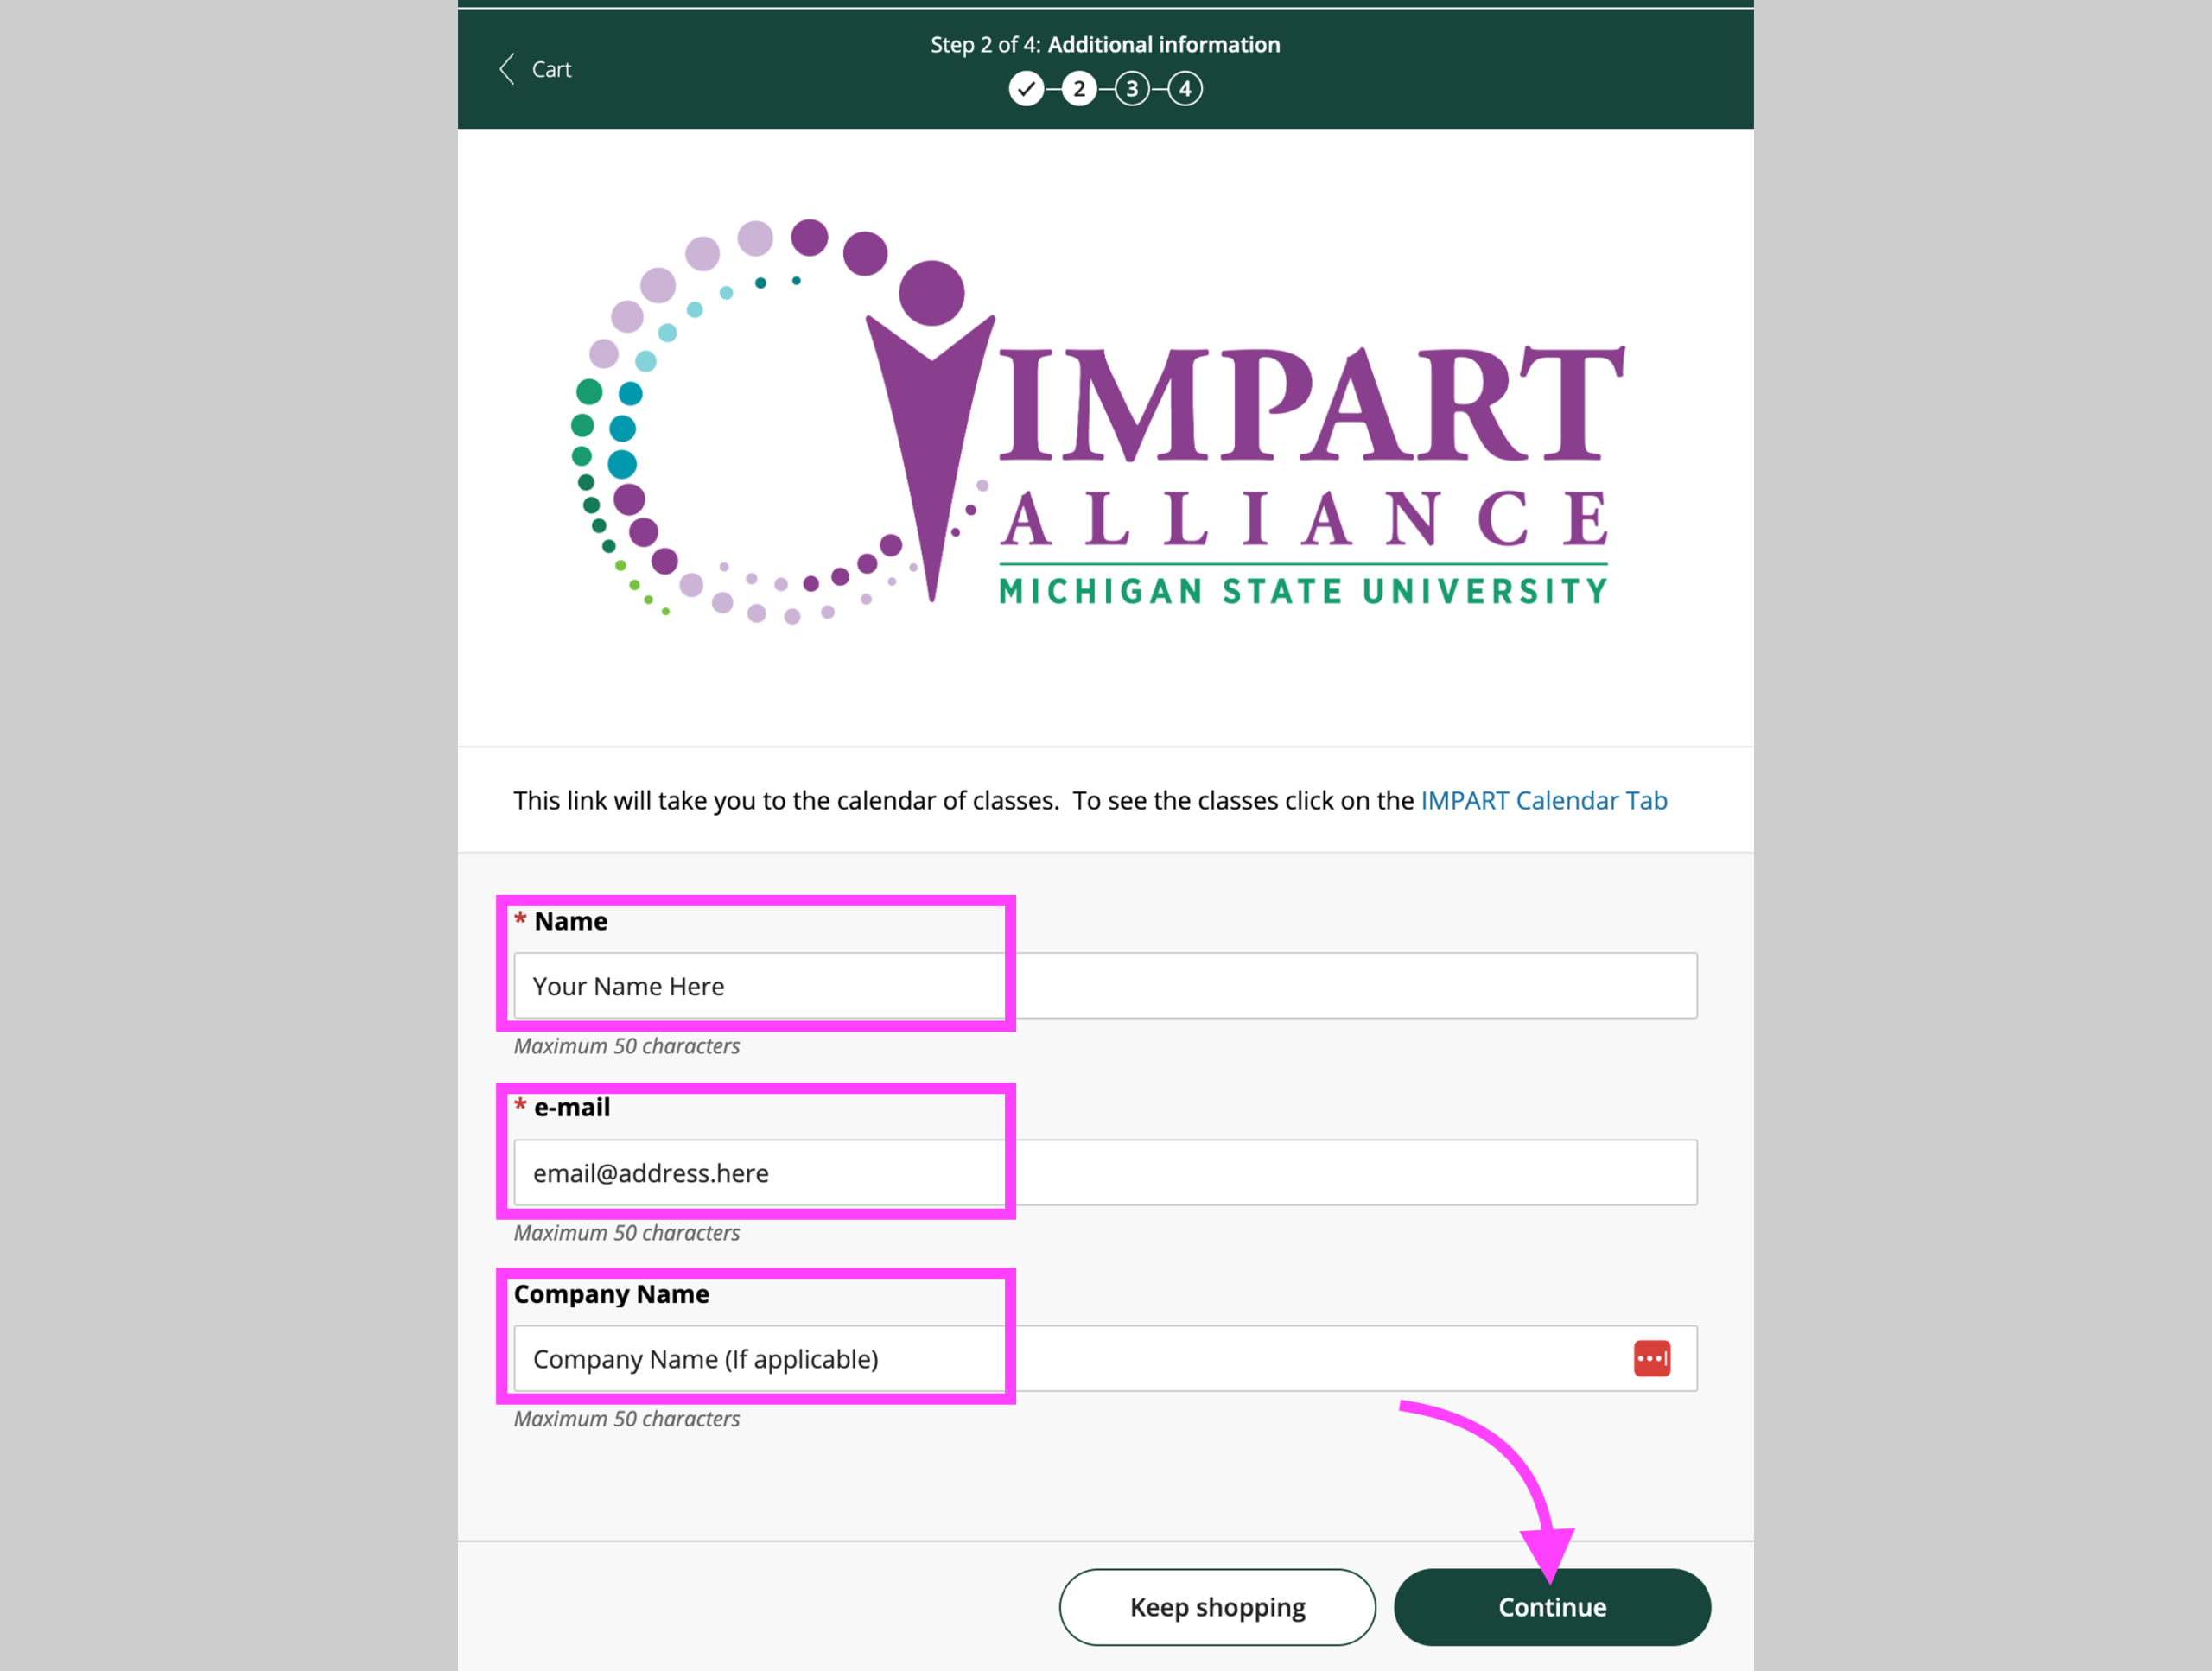
On the Checkout page, you will be presented with a list of all the courses you have selected. You may remove courses by clicking “the “Remove” link under each course in the cart, or click the “Keep Shopping” button in the bottom right to ad additional courses. Once satisfied with your selection, click the green “Continue” button in the bottom right. From here, you are prompted for your Name (required), e-mail (required), and Company Name. Once you have completed the form, click “Continue”. You will be presented with a “No payment is required” message. Click “Continue” once again. Now you will be presented with the details of your registration. Review this information, and if all is correct, click the “Pay $0” button in the bottom right. You will then be directed to the “Thank You” screen with receipt information.
